

15 Stacked Bob Haircuts for Volume and Shape (2026 Guide)
If your bob falls flat by lunchtime, the problem is rarely your hair. It is usually the shape underneath it. Stacked bob haircuts solve that problem with structure: short, graduated layers at the nape that build, layer by layer, into fullness at the crown, while the front keeps enough length to frame your face. The result is a short cut that holds its own shape instead of relying on daily teasing, backcombing, or a round brush marathon.
Below are 15 stacked bob haircuts organised by shape, hair texture, and finish, each with honest guidance on who it suits and a styling tip you can actually use. Bring a front photo and a back photo to your appointment — for this cut, the back view is half the decision.
Quick Answer
A stacked bob uses steep graduated layers at the back of the head — shortest at the nape, progressively longer toward the crown — to build volume and a rounded silhouette, with longer front pieces that angle toward the face. It suits fine hair that needs lift, thick hair that needs structured weight removal, and wavy or curly hair cut with its texture in mind. It typically needs a trim every 6–8 weeks, depending on how fast your hair grows, because the stack is a shape that grows out visibly. Start with the classic version (#1) if it is your first stacked bob.
What exactly is a stacked bob — and how is it different from an inverted bob?
“Stacked” describes the layering at the back. Picture shingles: the shortest layer sits at the nape, each layer above it is slightly longer, and together they create a shelf of volume that lifts the crown. The front pieces are left longer, so the silhouette angles forward.
“Inverted” and “A-line” describe a related but different thing: the angle of the perimeter from back to front. An inverted bob is shorter at the back and longer at the front, and it may or may not have much stacking. In practice the terms overlap — many inverted bobs are stacked, and a stacked bob almost always angles forward — which is why salon photos matter more than salon vocabulary. Show your stylist the back view you want, and ask how much graduation they plan at the nape.
How it differs from its neighbours on this site: our Italian bob keeps its weight low, in a full, blunt-ish perimeter with minimal layering, so the fullness sits at the ends. A stacked bob puts the fullness at the crown and back instead. And a bixie is shorter and softer all over, a pixie-bob hybrid, without the steep stacked nape. If you want crown lift and a rounded back, you are in the right place.
1. The Classic Stacked Bob
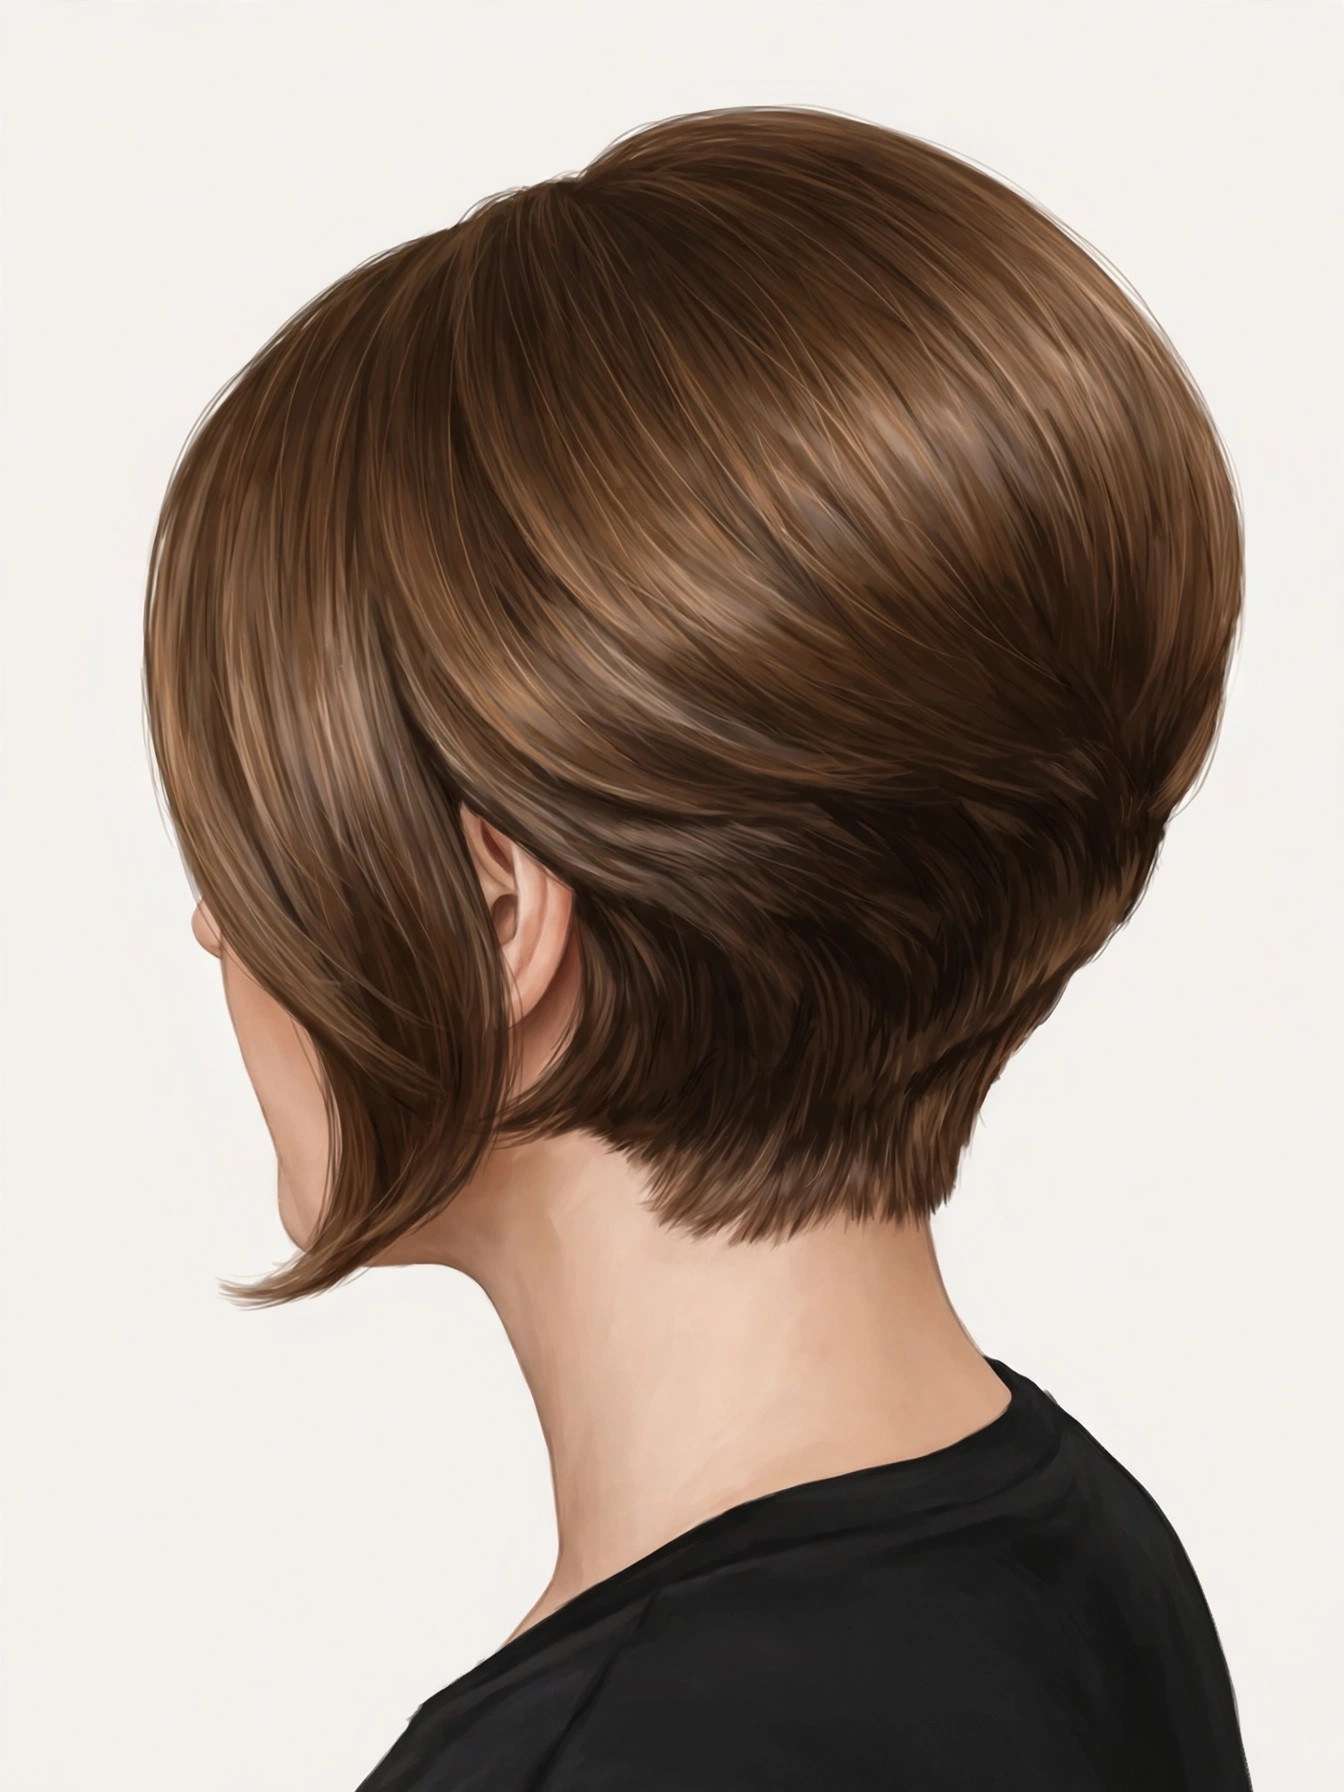
The blueprint everything else on this list is built from. A jaw-length front, a short graduated nape, and a rounded crown that holds its shape from every angle. The graduation is clear but blended — you see volume, not steps. Who it suits: fine to medium hair that goes flat in a one-length bob; oval, heart, and square faces. What to ask for: “graduated layers stacked at the nape, blended, front pieces to the jaw, rounded crown.” Styling tip: blow-dry the back first, directing the hair upward with a round brush, then smooth the front pieces under once. The lift is built while the back is damp, not added afterwards.
2. The Inverted Stacked Bob
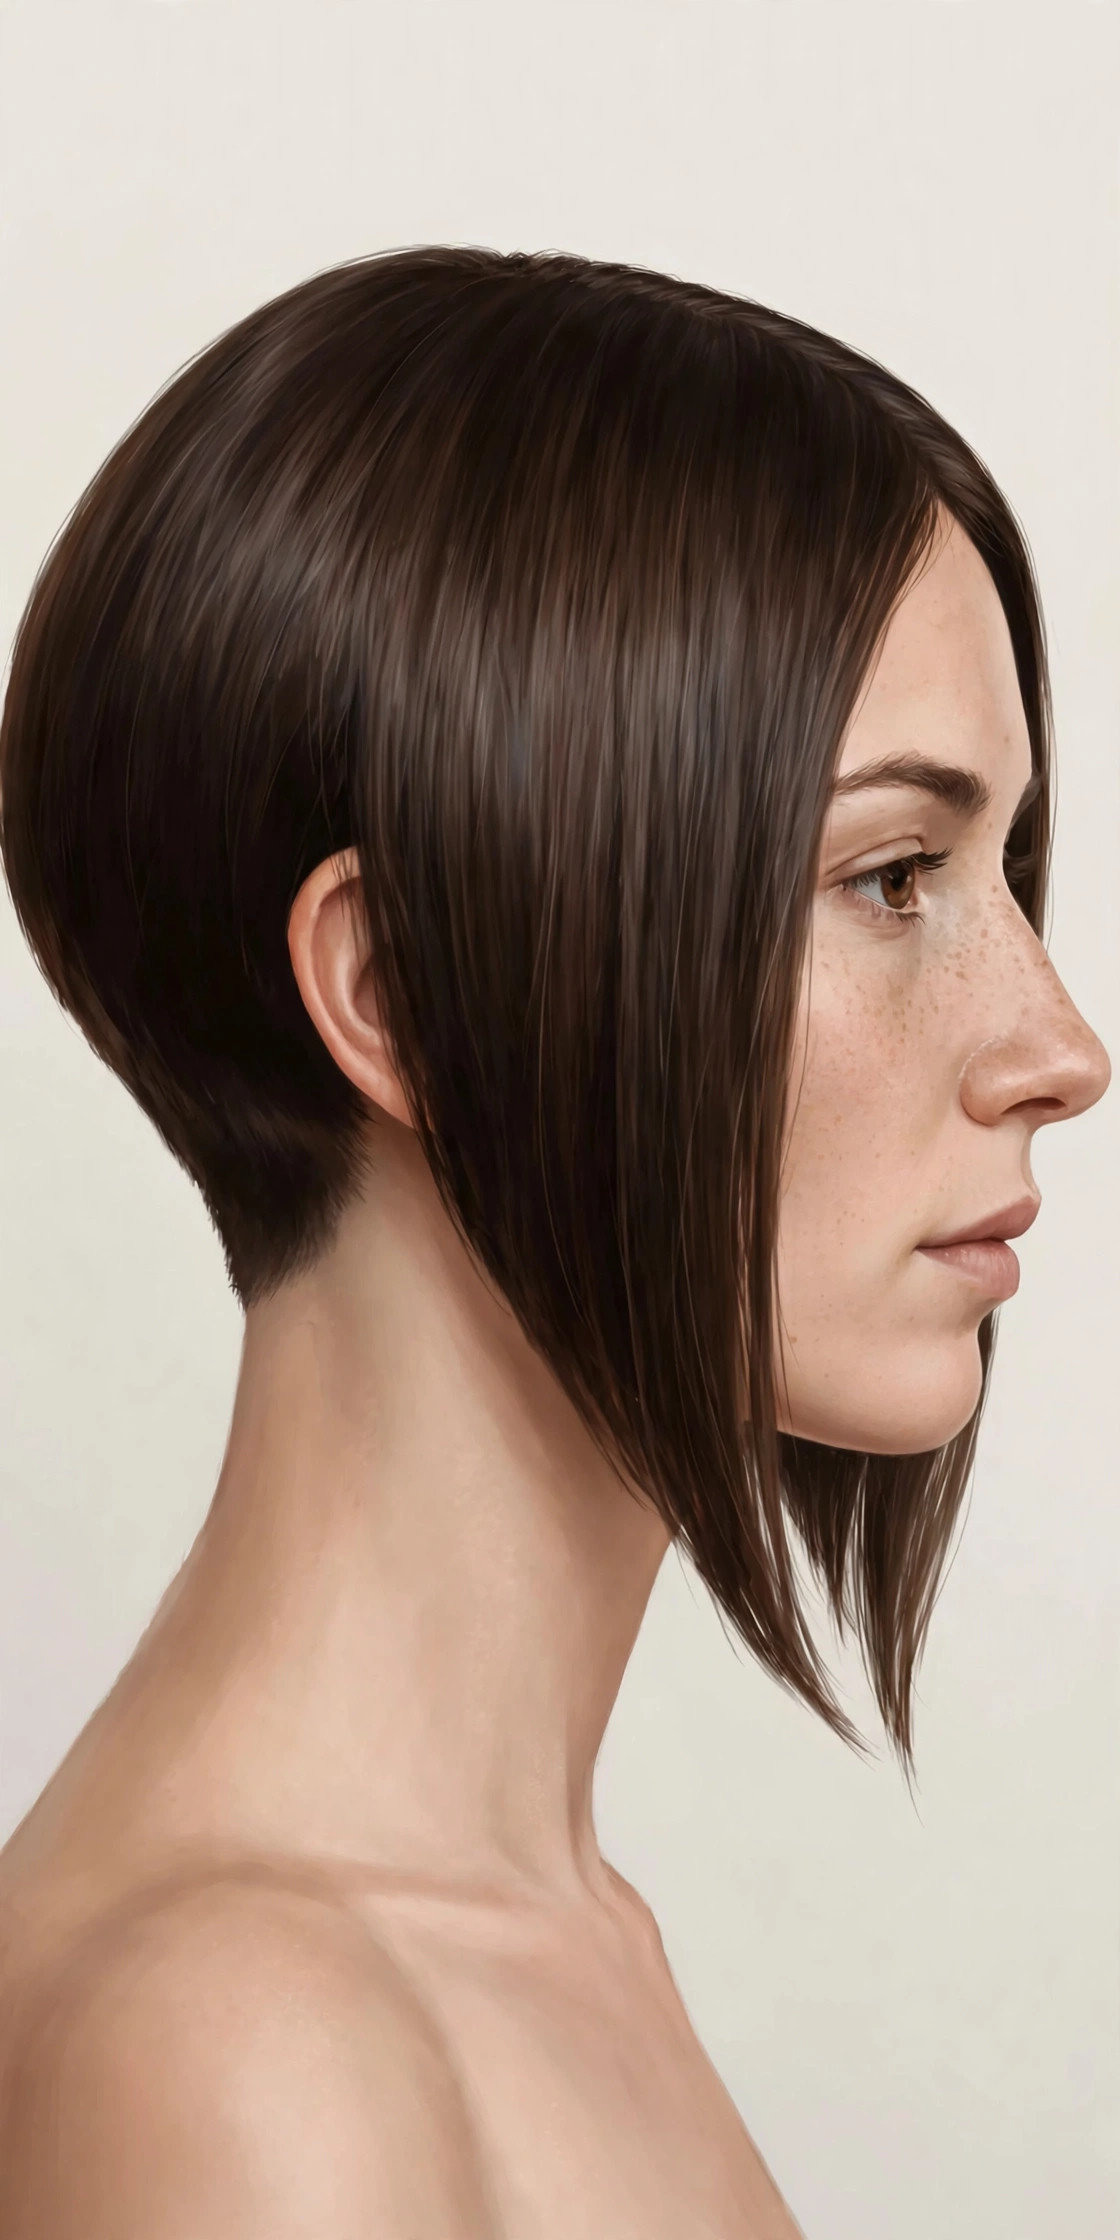
The most dramatic angle on this list: a tightly stacked, short back with front pieces that drop clearly longer, toward the chin or collarbone. The contrast is the point — height at the back, length at the front. Who it suits: straight to slightly wavy hair that holds a clean line; readers who want the angle to be visible. What to ask for: “steep graduation at the back, front pieces clearly longer, show me the angle from the side before you finish.” Styling tip: keep the front pieces smooth and the back lifted; smoothing the whole cut flat erases the angle you paid for. A side-part version of this cut softens the drama on days you want it quieter.
3. The Subtle Stacked Bob
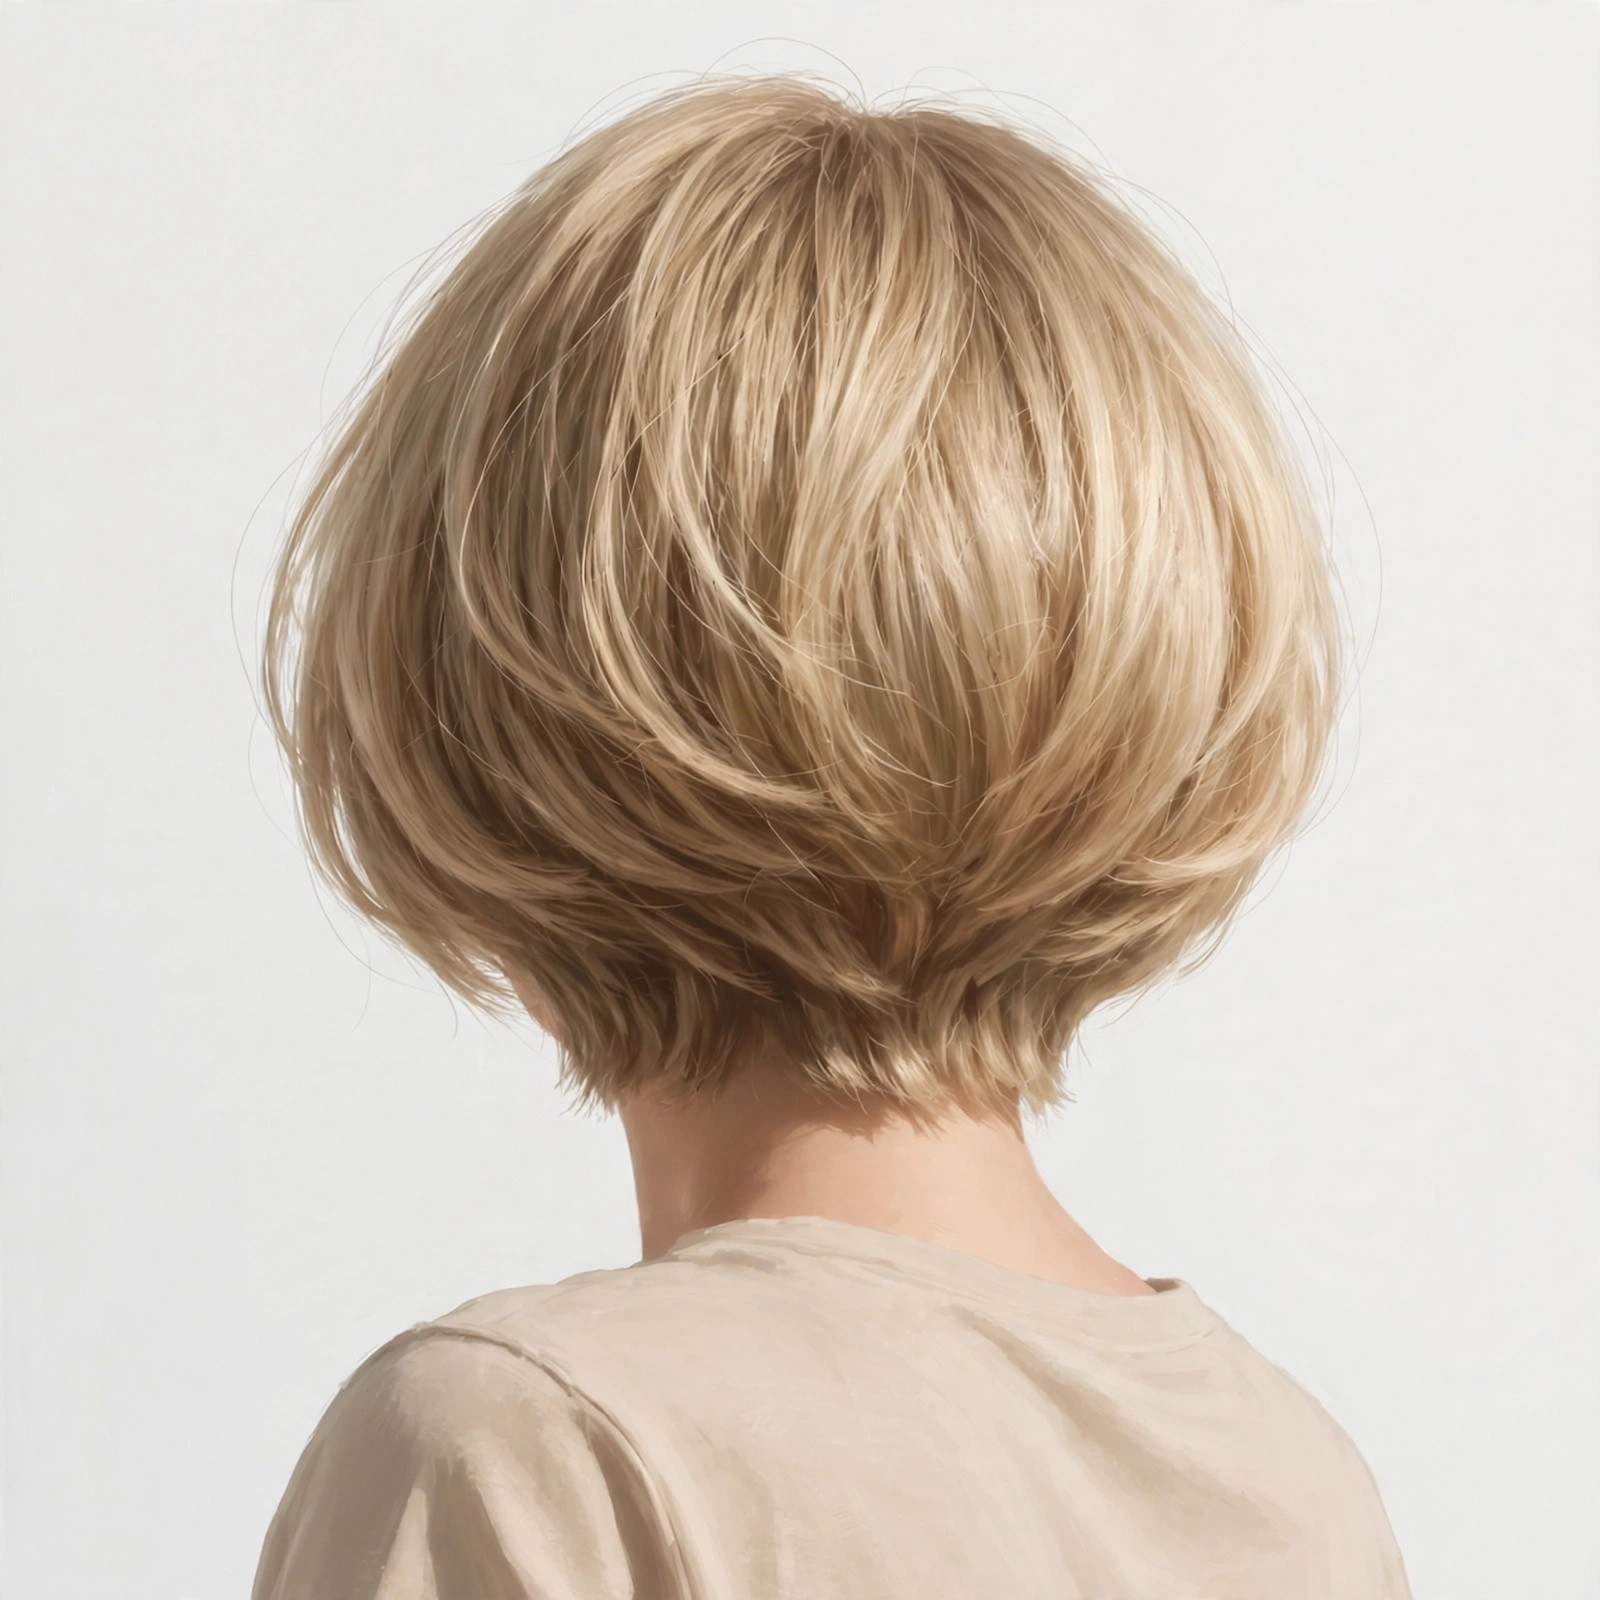
Stacking, turned down low. The graduation is concentrated right at the nape, the rest of the cut stays fairly full, and the overall effect is lift without an obvious stacked silhouette. This is the version for readers who like the idea but worry about a severe shape. Who it suits: very fine or delicate hair, and anyone trying a stacked bob for the first time. What to ask for: “light graduation only at the nape, keep the perimeter full, nothing choppy on top.” Styling tip: a volumising mousse at the roots before blow-drying is enough; heavy oils or serums at the crown can flatten the small amount of lift this version builds.
4. The Choppy Stacked Bob
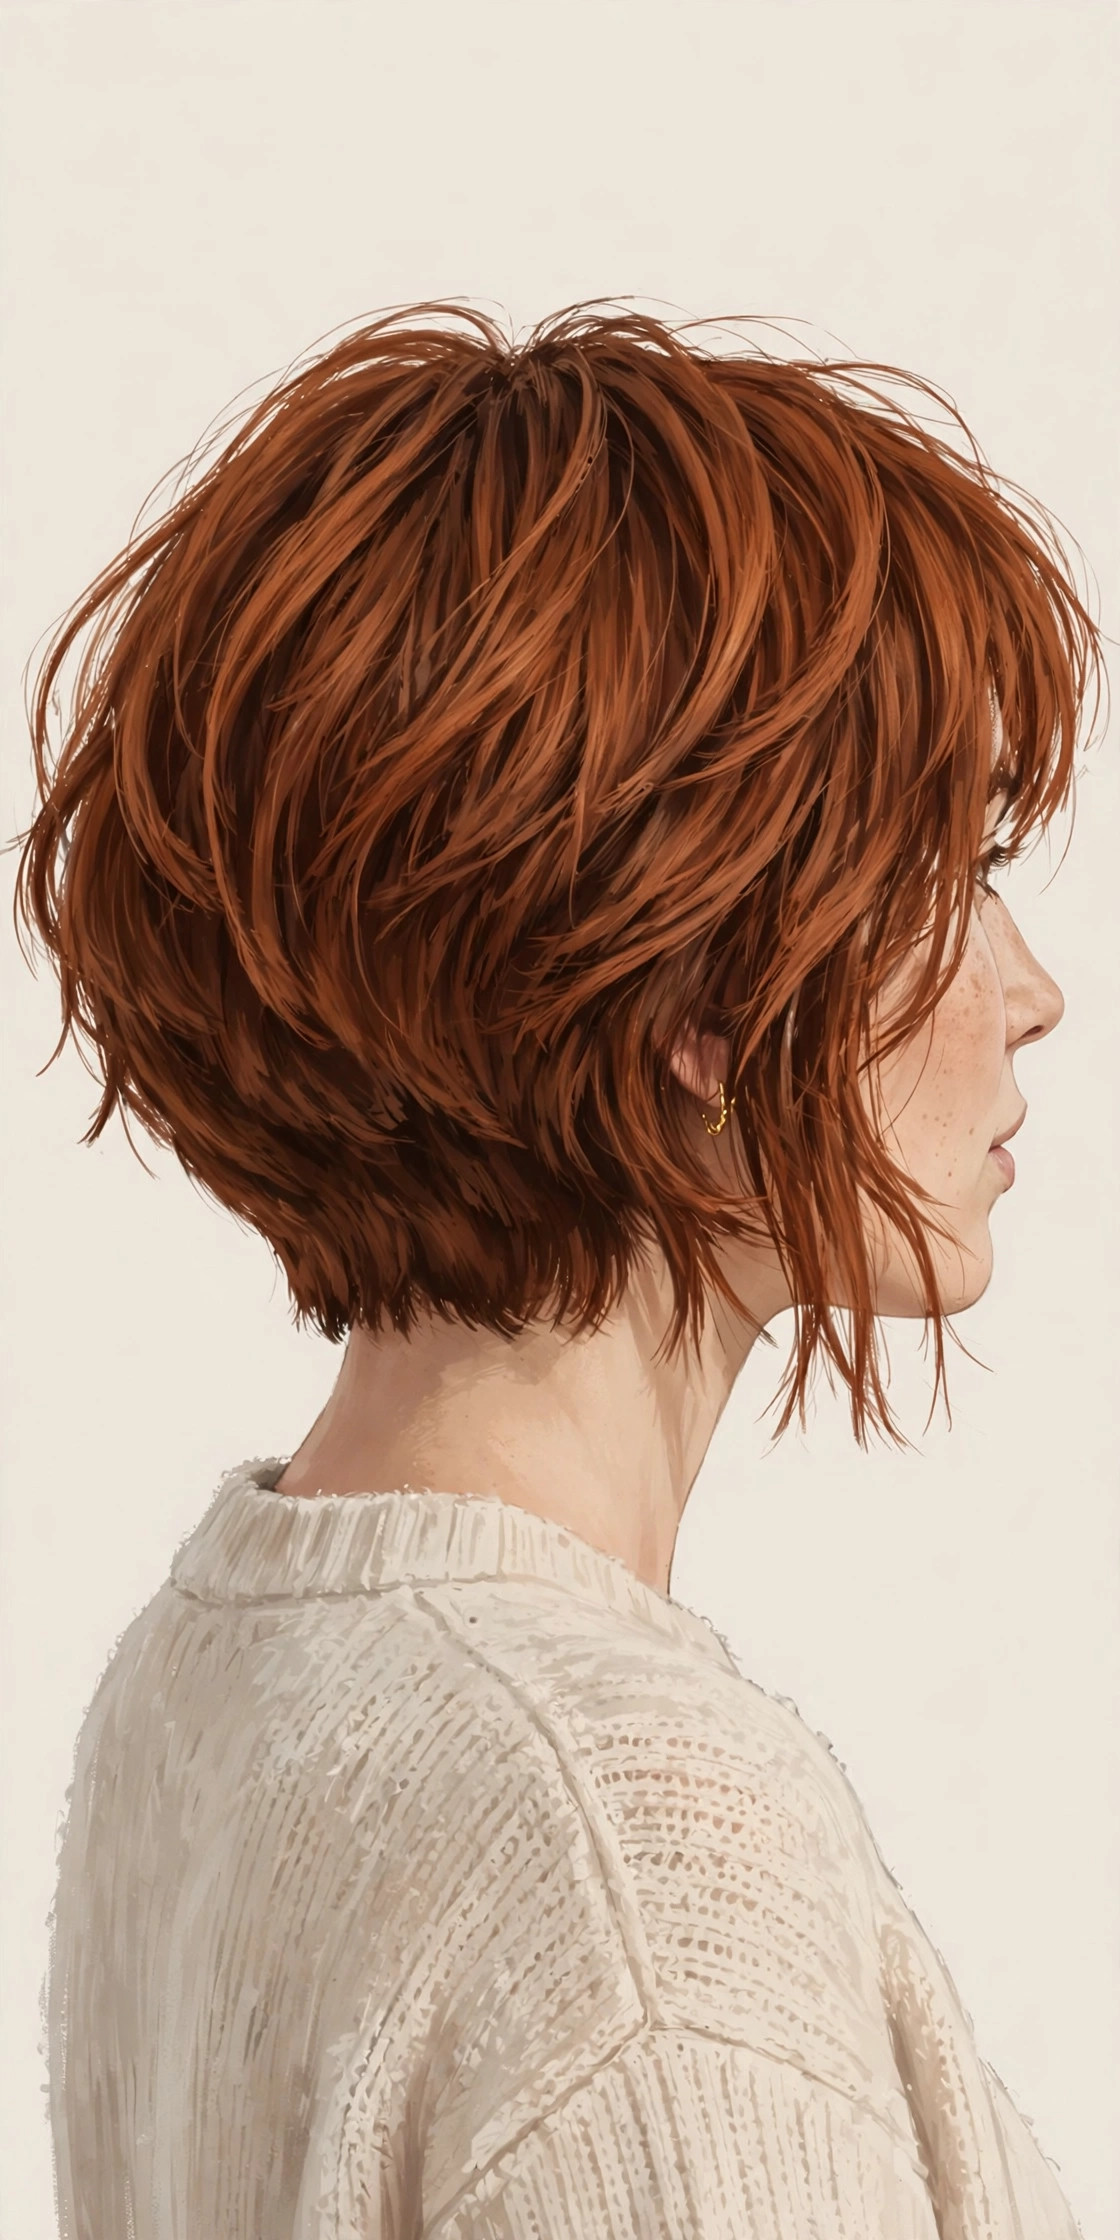
The same stacked back, with the surface layers broken up into piecey, uneven ends. The texture stops the rounded shape from reading too neat or too formal, and it gives the cut movement when you turn your head. Who it suits: medium to thick hair that holds texture; straight and wavy hair that needs the cut itself to create movement. What to ask for: “stacked back, point-cut or razor-softened ends, piecey finish, not blunt.” Styling tip: a pea-sized amount of texturising paste, pinched through dry ends, is the whole routine. Brushing it smooth afterwards undoes the point of the texture.
5. Stacked Bob for Fine Hair
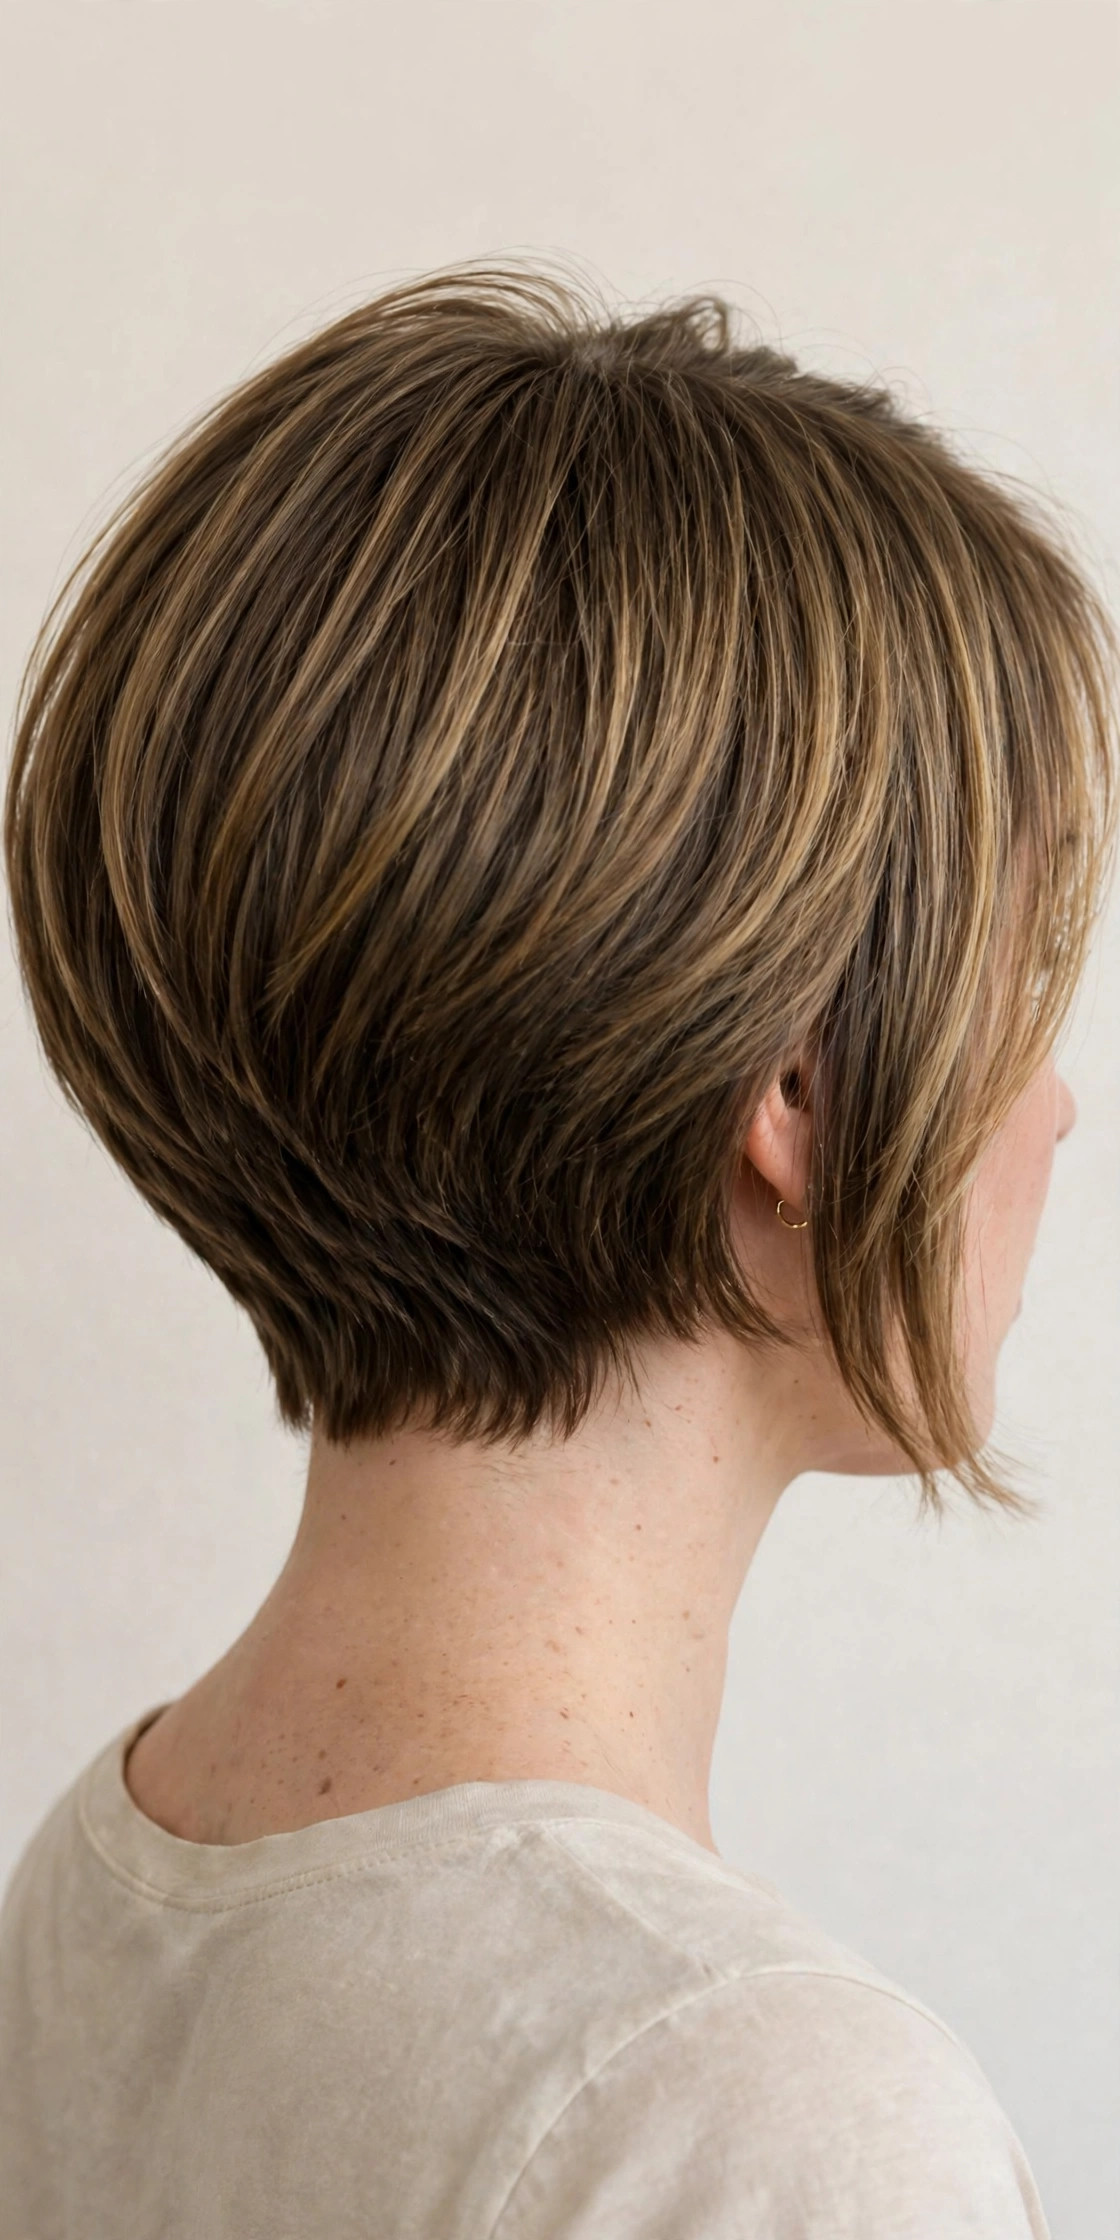
This is the version the stacked bob was arguably made for. With less length weighing it down and graduation lifting the back, fine hair gets a shelf to sit on, so it reads fuller at the crown and denser at the perimeter. The key is keeping weight around the bottom edge rather than thinning it away. Who it suits: fine, flat, or thin hair; petite features that a heavier bob can overwhelm. What to ask for: “stacked back for lift, keep the perimeter fairly full, no heavy thinning through the ends.” Styling tip: flip your part to the opposite side while blow-drying the roots, and dry the crown upside down for a minute. Root direction does more for fine hair than extra product does.
6. Stacked Bob for Thick Hair
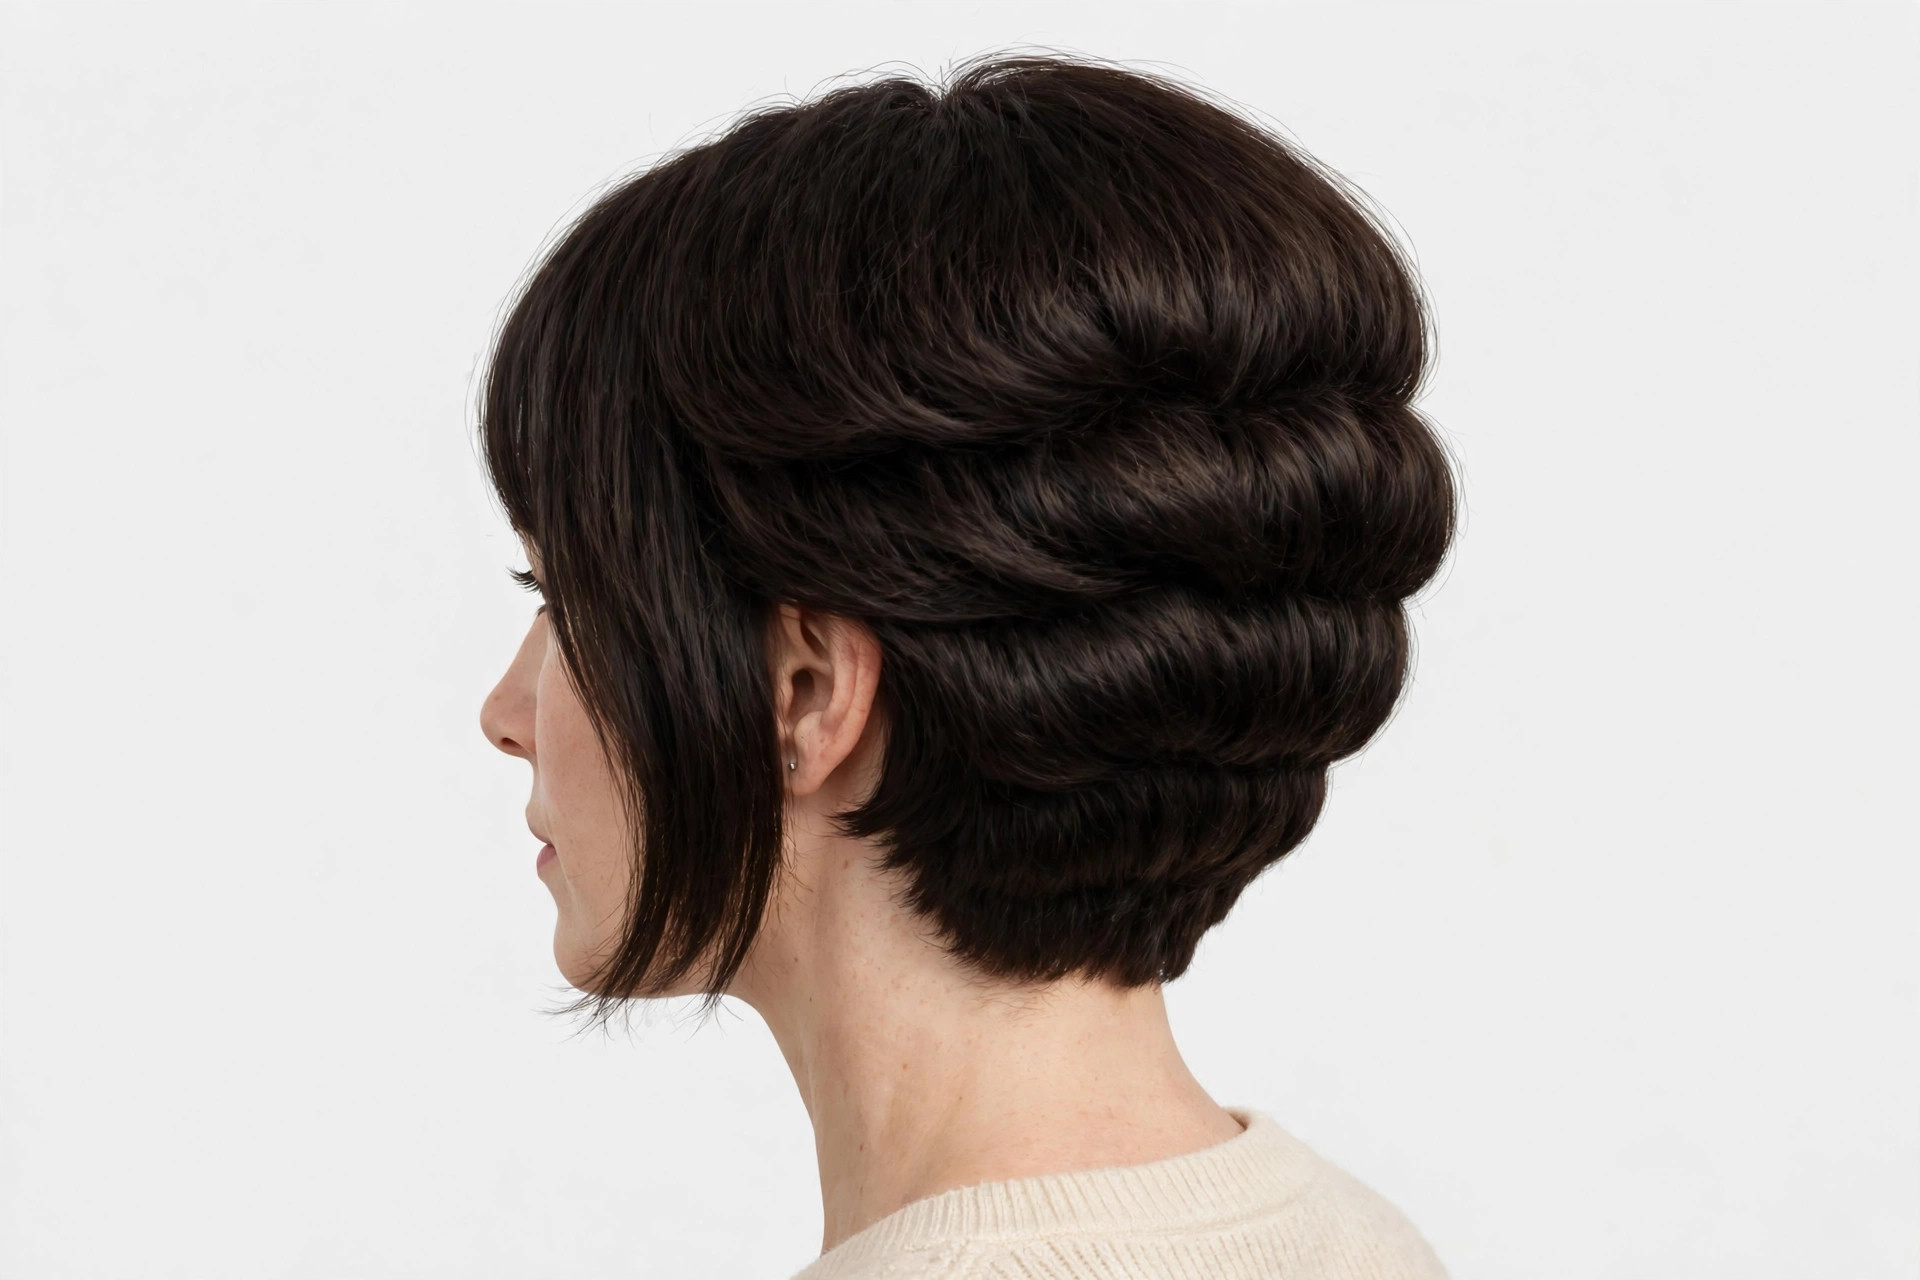
Thick hair needs the stack to do a different job: remove bulk in a controlled way, so the shape sits close instead of widening into a triangle. Here the graduation is paired with interior layering, so weight comes out from inside the shape while the outline stays rounded and full. Who it suits: dense, coarse, or very thick hair of any pattern. What to ask for: “take the weight out with interior layers and graduation, keep the perimeter rounded, not blunt and heavy.” Styling tip: a smoothing cream through the mid-lengths before blow-drying keeps the shape sleek; this is the one stacked version where smoothing helps rather than flattens, because the volume is already built into the cut.
7. The Curly Stacked Bob

Curls and stacking need a careful conversation, because curls spring up as they dry. Cut with the curl pattern in mind — ideally dry, or curl by curl — the stacked back gives curls a shape to sit in instead of letting them pile up at the sides, and the shorter back stops the shape from widening. Who it suits: wavy-to-curly patterns (roughly 2C–3C) that want a short shape without daily heat. What to ask for: “cut dry or curl by curl, stacked back judged at its dry length, rounded layers, no blunt bottom edge.” Styling tip: curl cream on soaking-wet hair, scrunch, diffuse on low heat or air-dry. Never brush it dry — brushing breaks the curl pattern this shape depends on.
8. The Wavy Stacked Bob
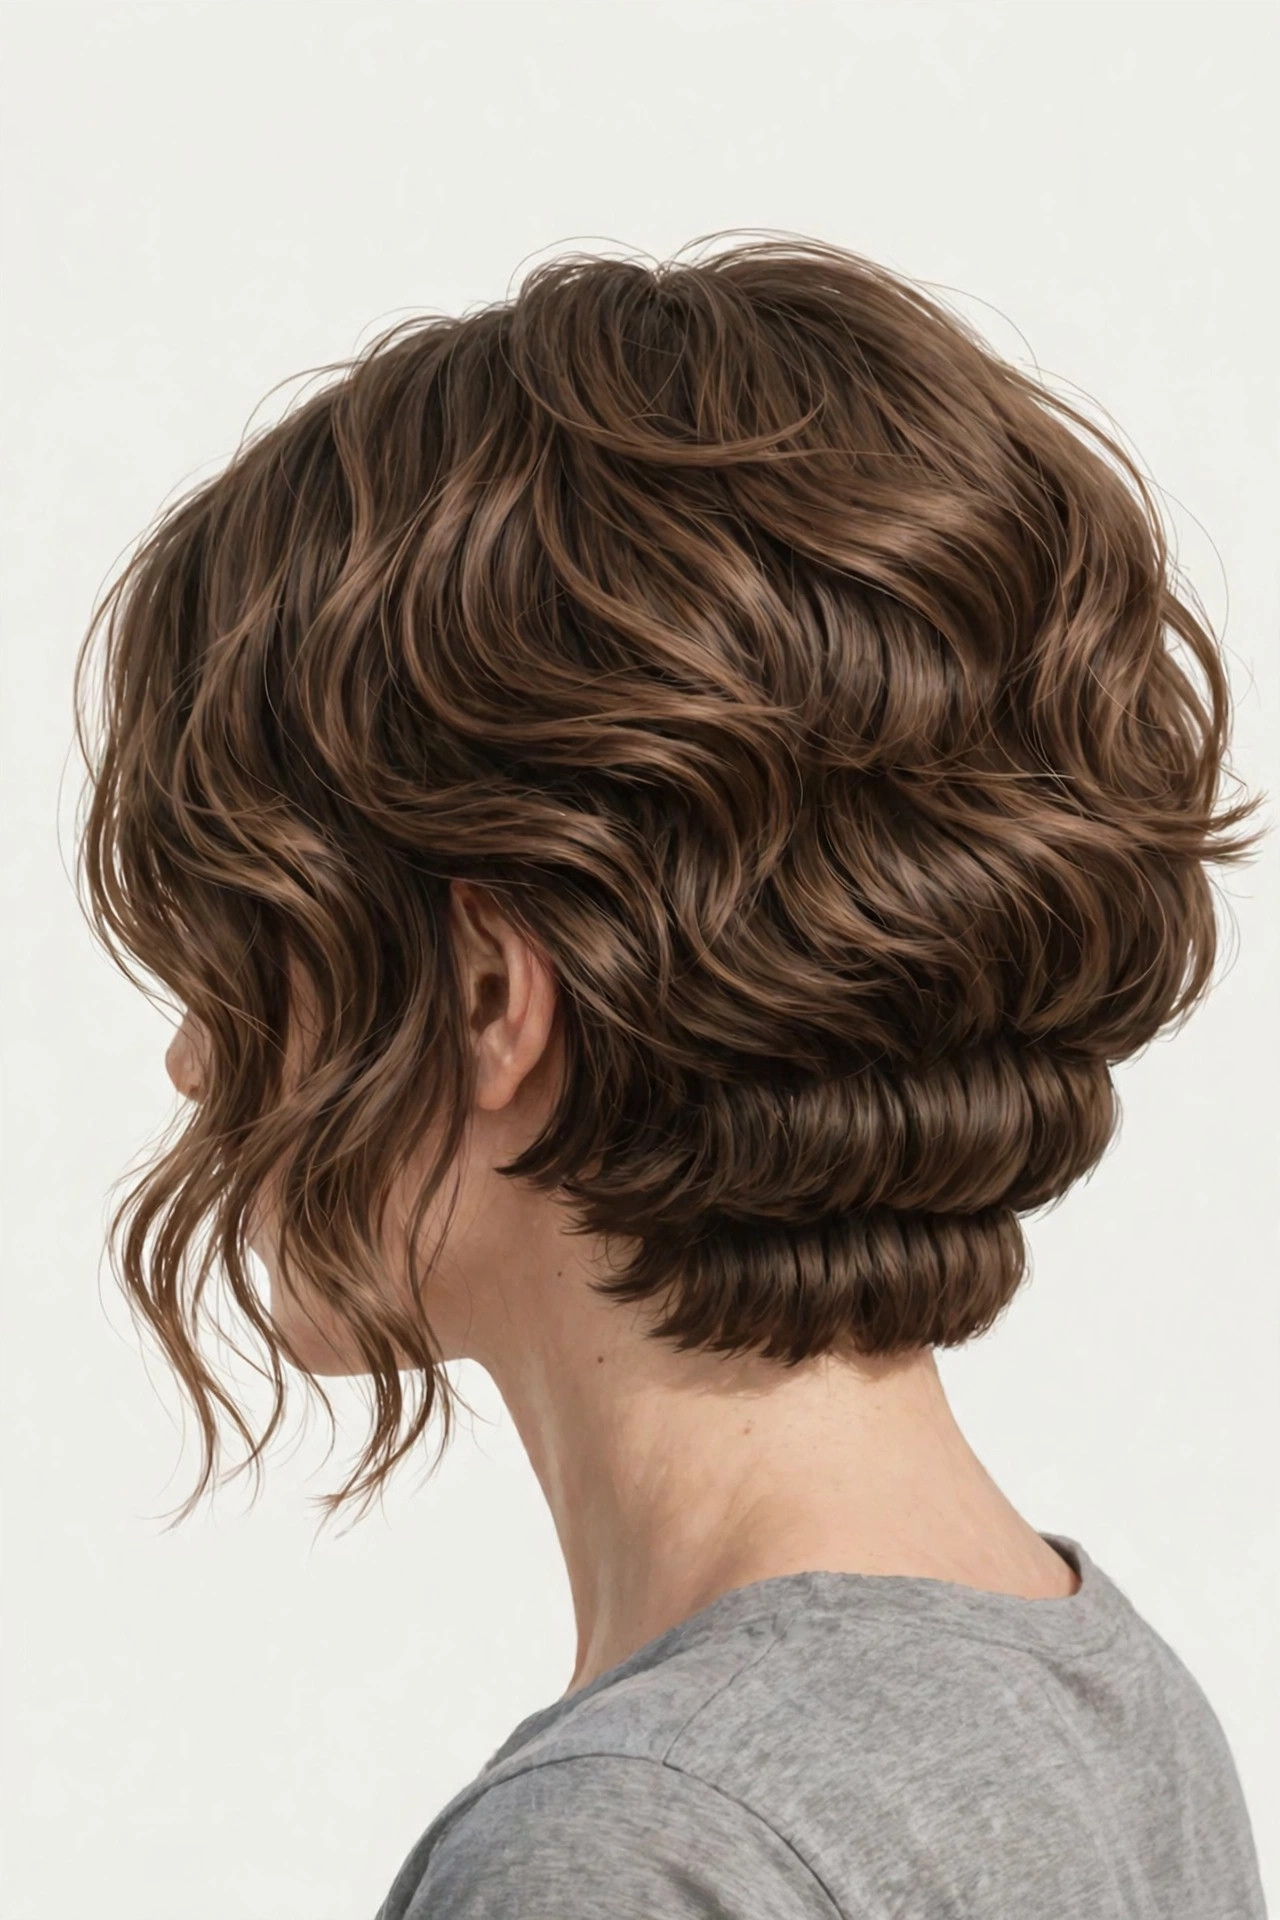
Waves are the stacked bob’s easiest partner. The graduation lifts the back, the waves supply the movement, and the front pieces fall softly instead of needing to be styled into place. It is also the most forgiving version as it grows out, because waves hide uneven growth between cuts. Who it suits: natural waves (roughly 2A–2C); low-maintenance routines. What to ask for: “a wavy bob, stacked back, light layers, face-framing pieces starting at the cheekbones.” Styling tip: salt spray or light mousse on damp hair, scrunch, air-dry. That is genuinely the whole routine on most days — leave it alone once it starts drying.
9. Stacked Bob with Curtain Bangs
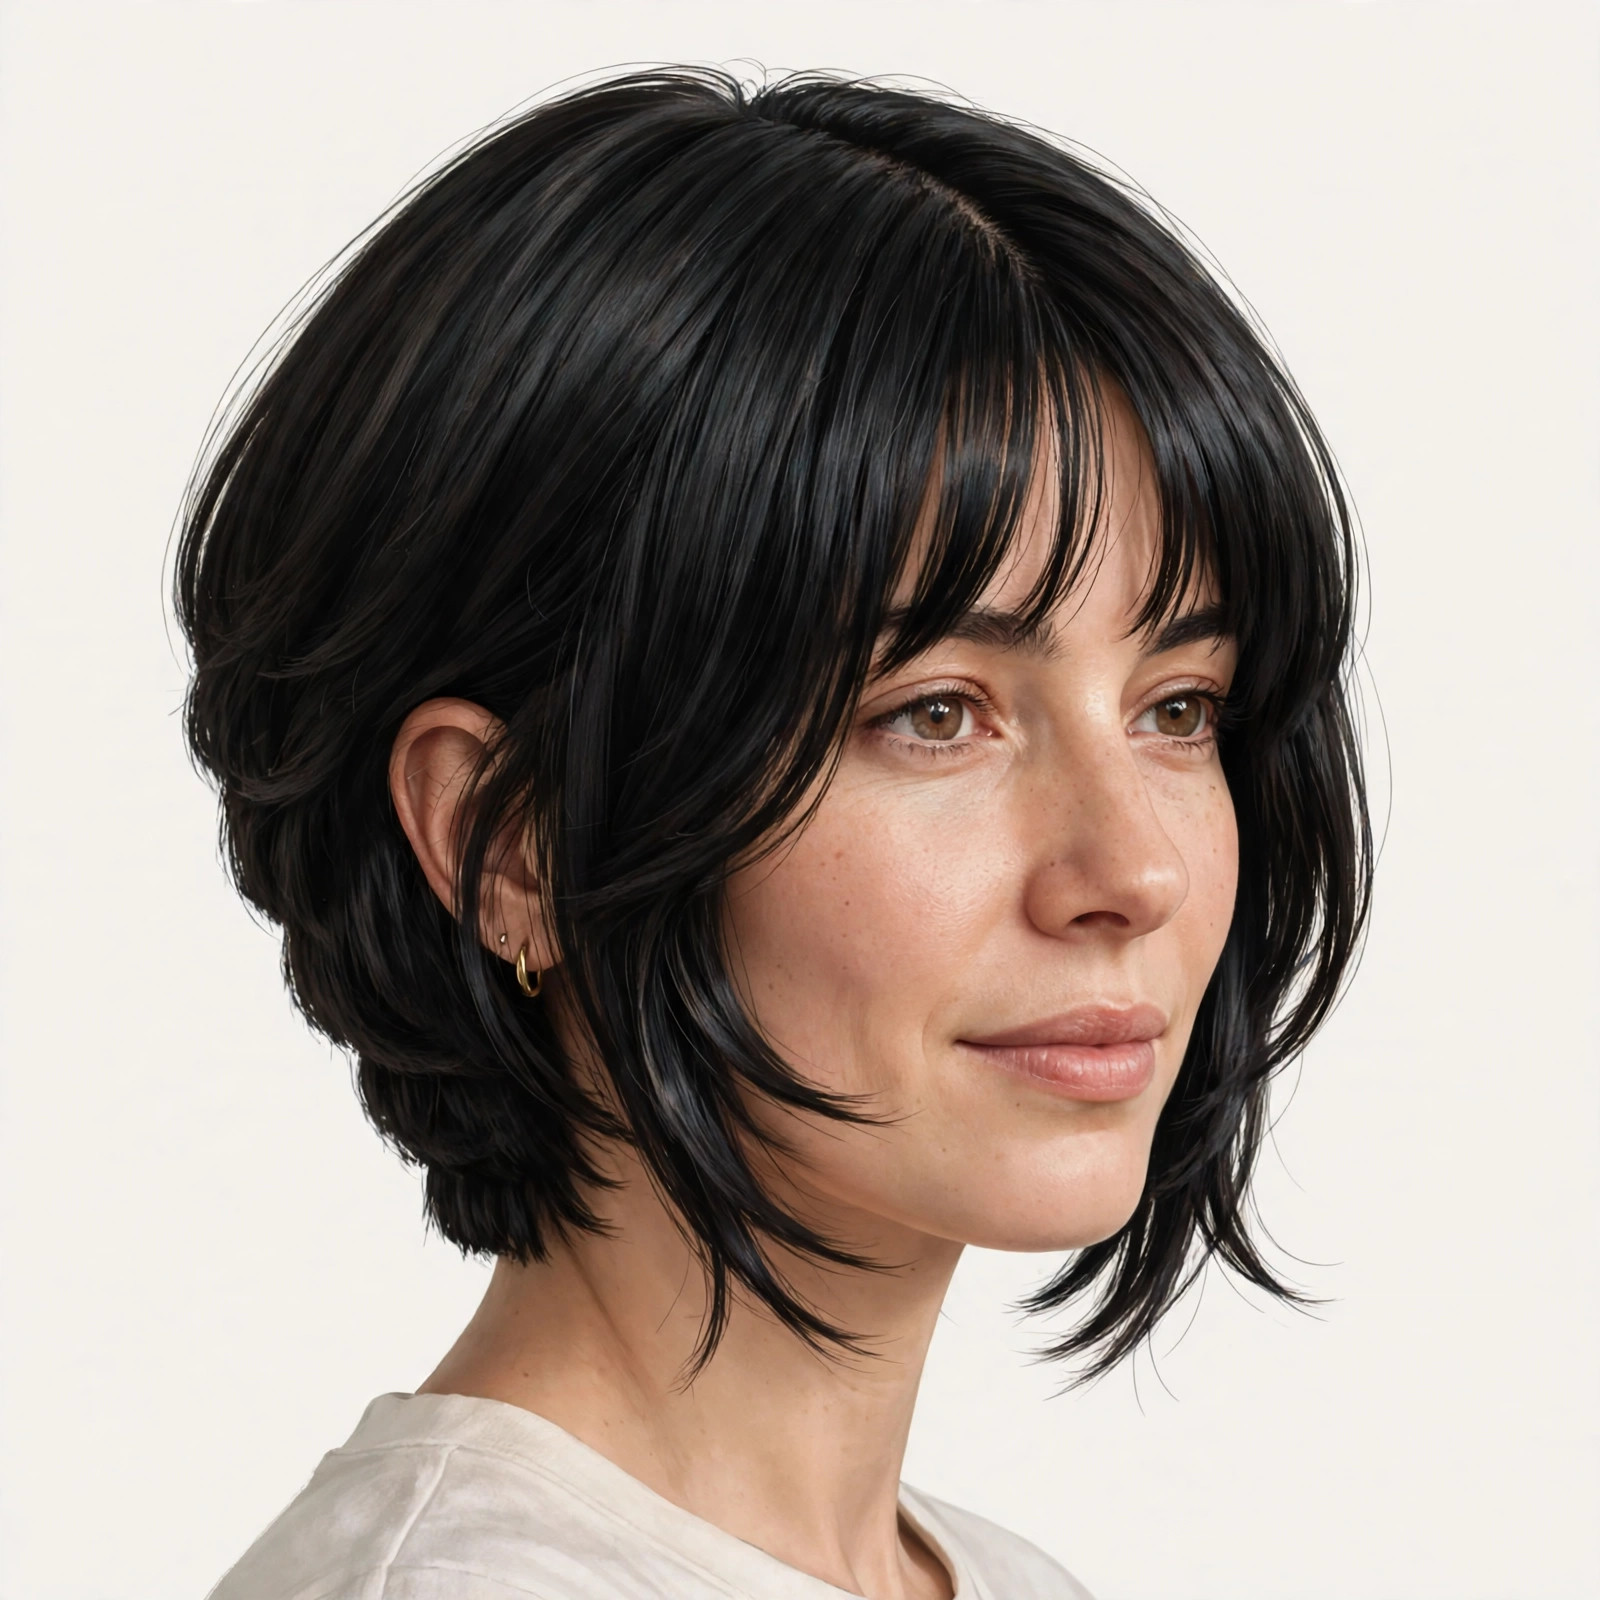
A parted, curtain-style fringe that melts into the stacked bob’s face-framing layers, so the front reads as one continuous shape. The bangs soften the structure of the stack without hiding the face, and they give the cut a focal point at the front to balance the volume at the back. Who it suits: round and square faces (the parted fringe opens up the face); medium to long stacked fronts. What to ask for: curtain bangs that blend into the shortest face-framing layers, parted in the middle. Styling tip: blow-dry the bangs outward with a round brush, then let the rest air-dry or blow-dry smooth for contrast. Our curtain bangs guide has more face-shape pairings.
10. Stacked Bob with a Straight Fringe
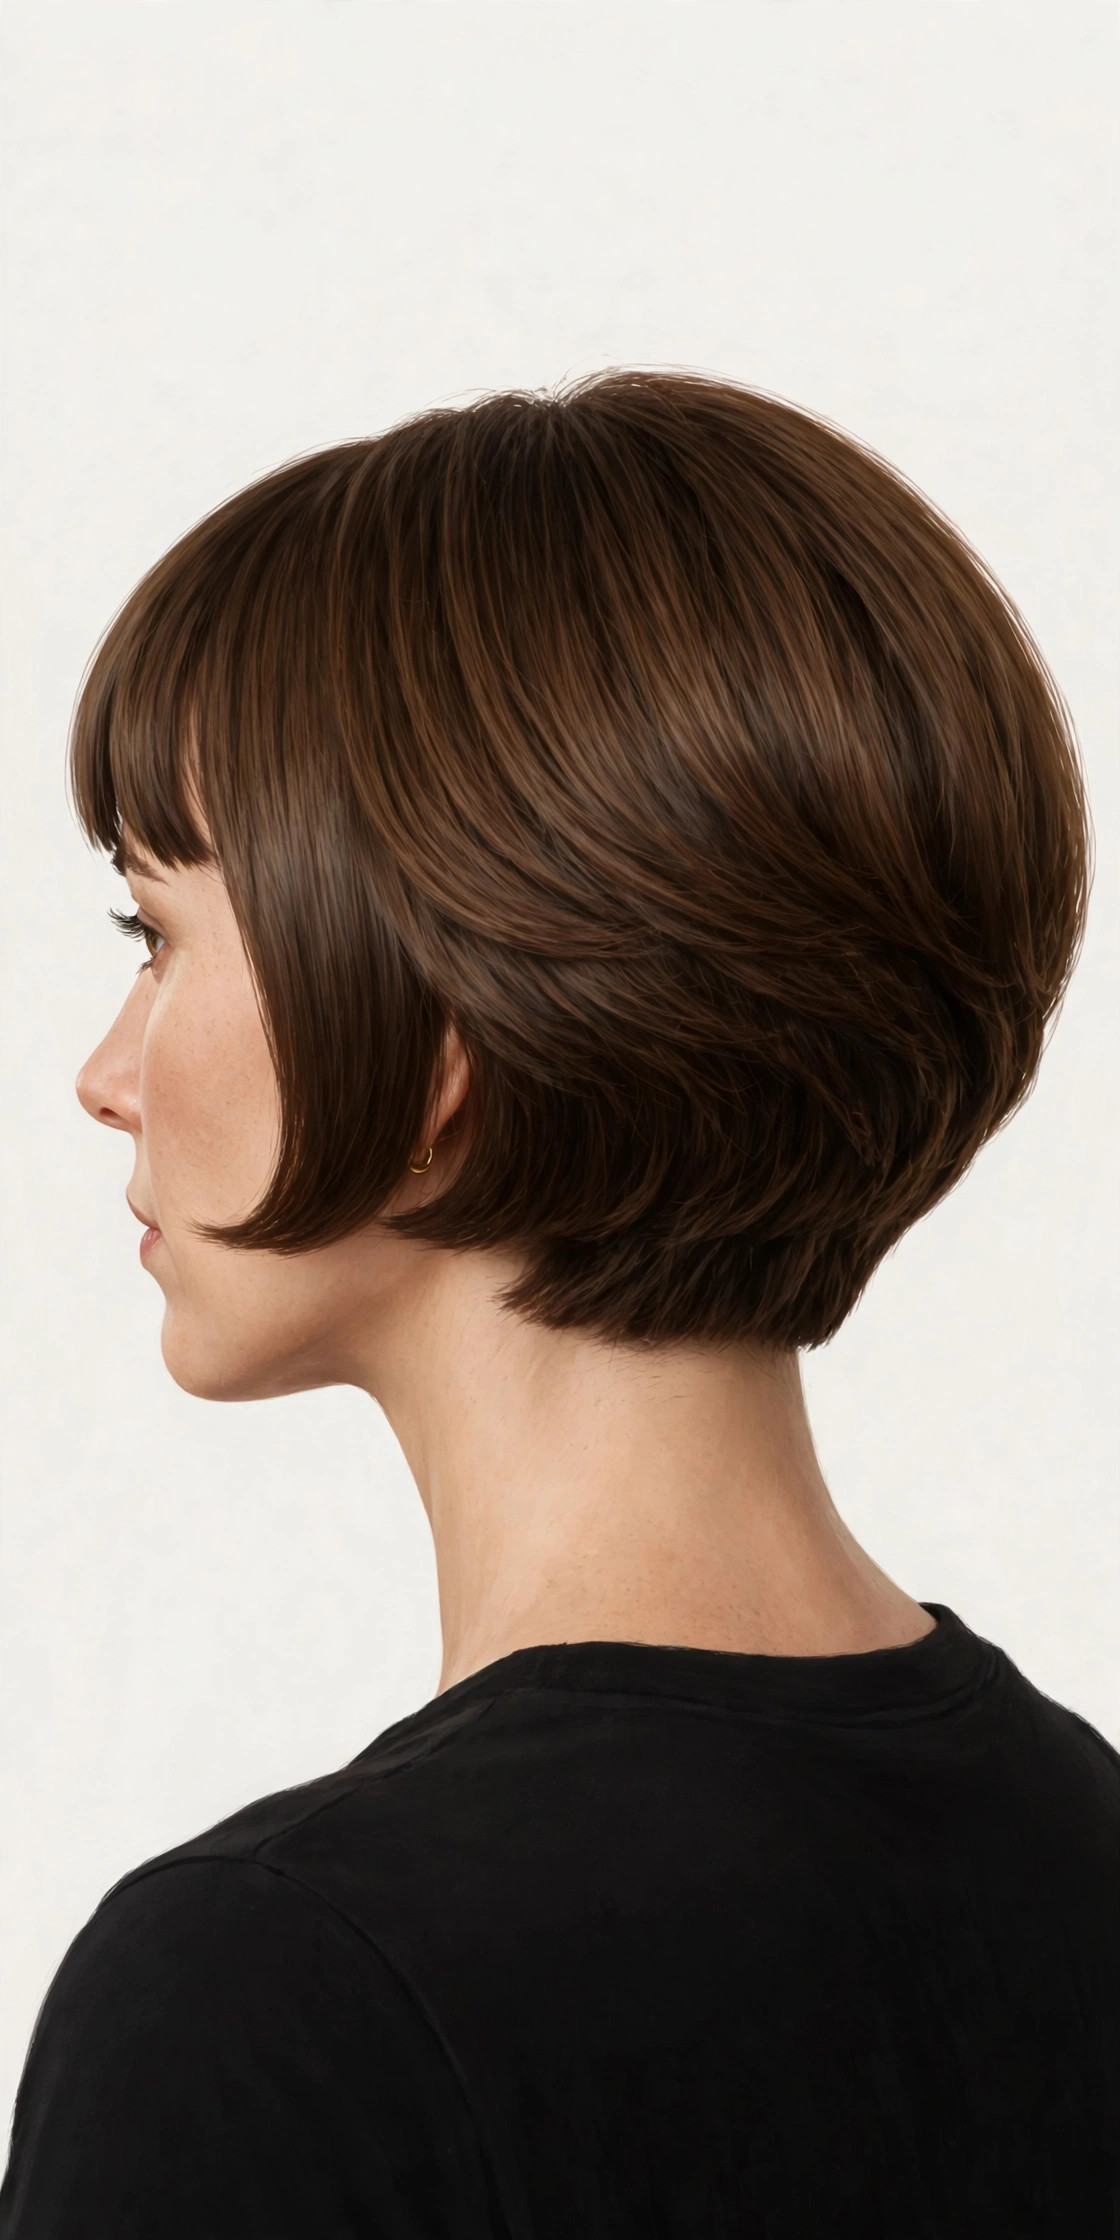
The boldest front on this list: a straight, deliberate fringe meeting a rounded stacked shape. The two horizontal lines — fringe above, jaw length below — frame the face between them, and the stack keeps the back from looking heavy beside them. Who it suits: oval and longer faces, and higher foreheads — the fringe shortens the face visually. What to ask for: “straight fringe, cut dry at the length you want it to sit, blended at the temples into the sides.” Styling tip: dry the fringe first, brushing it side to side with the dryer pointing down, before you touch the rest. A fringe that dries in the wrong shape cannot be rescued by product later, and fringe trims are needed more often than full cuts — typically every 4–6 weeks, depending on growth.
11. The Chin-Length Stacked Bob
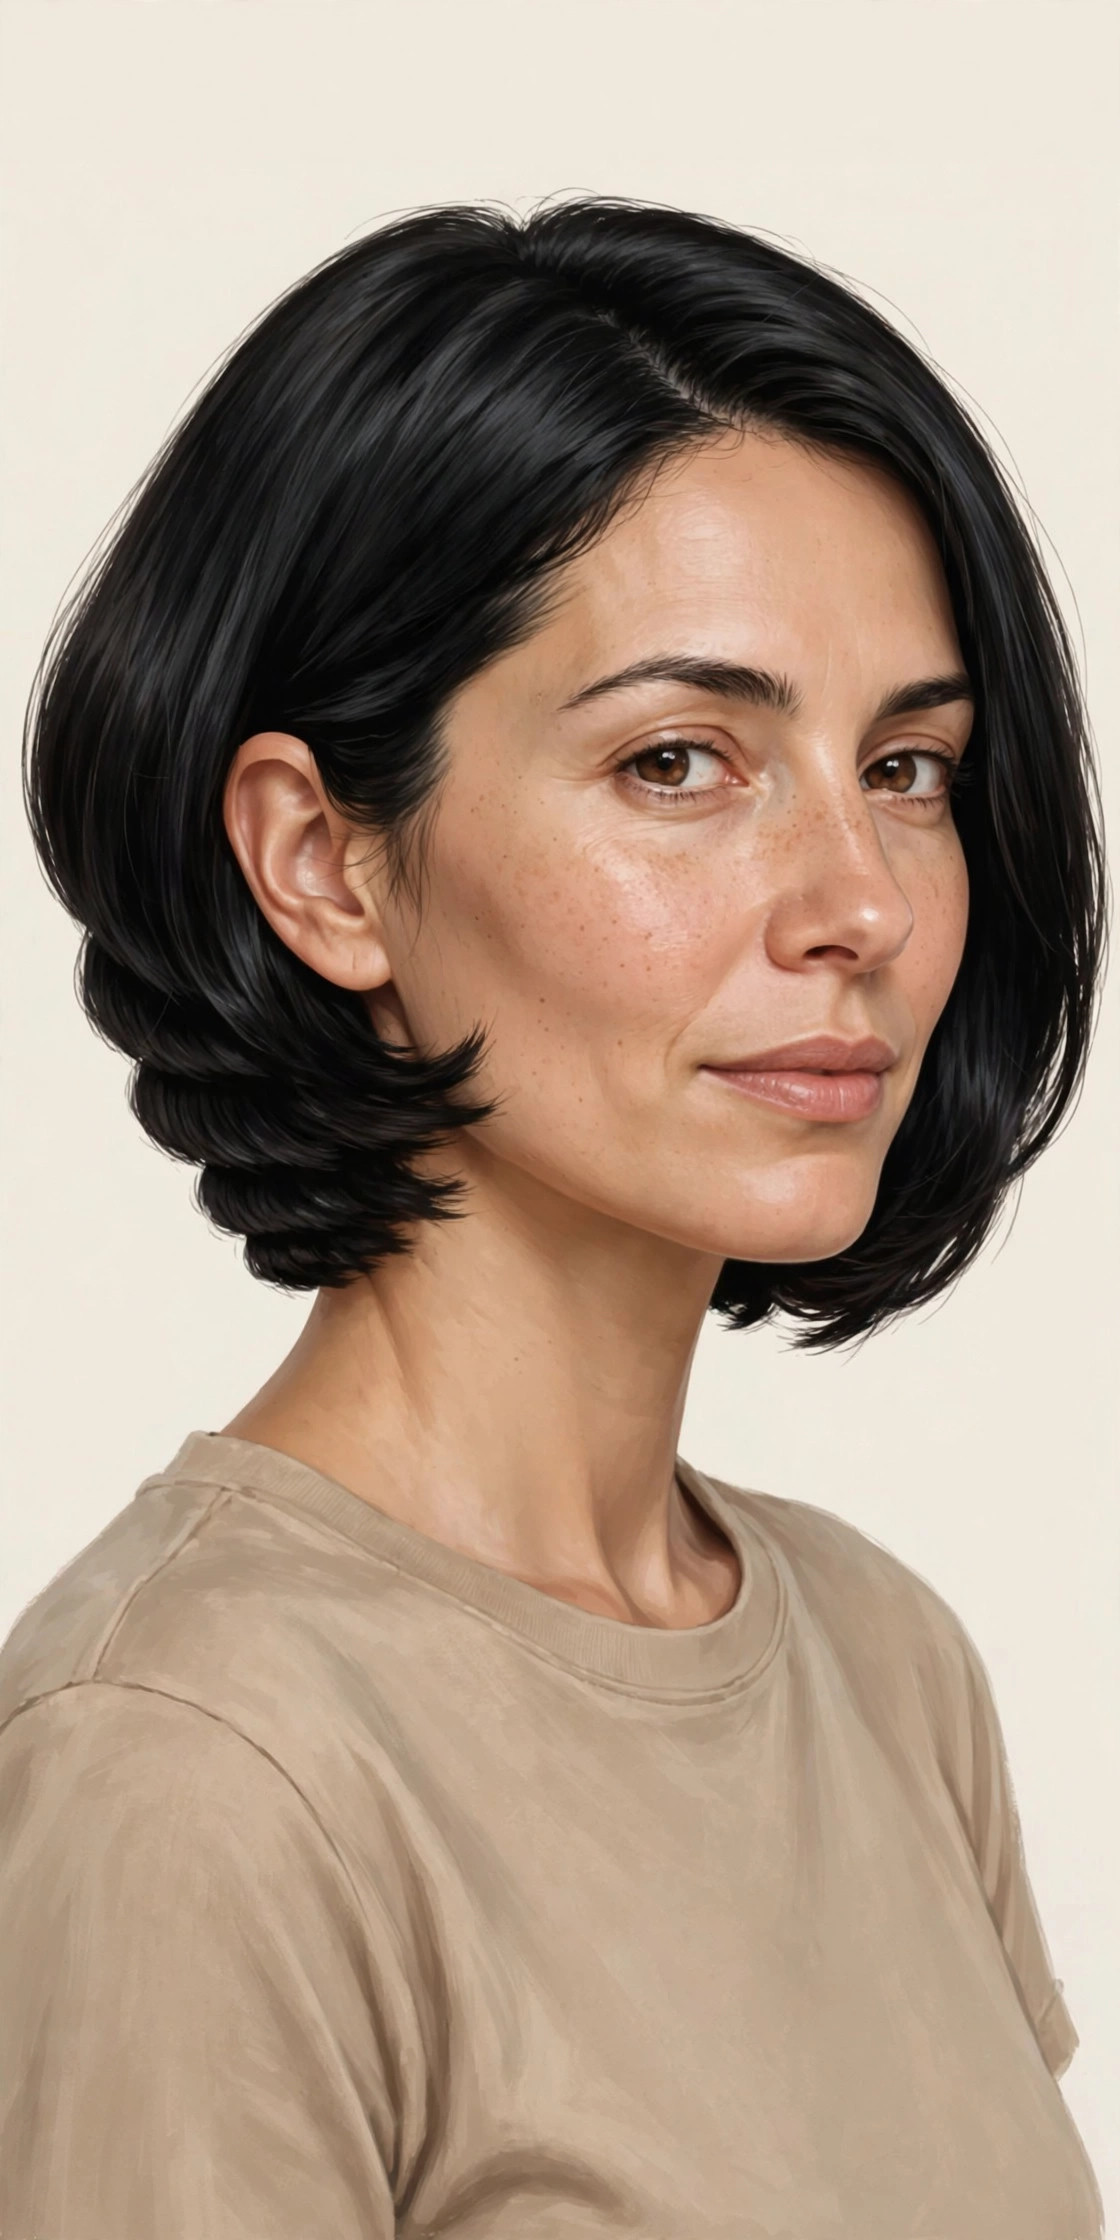
Short, sharp, and confident: a bob that ends right at the chin, with the stack doing its work entirely behind the ears. This length frames the jawline and cheekbones, so it suits strong bone structure, and it is one of the easiest stacked bobs to keep looking neat between cuts. Who it suits: oval, heart, and square faces; straight or slightly wavy hair. What to ask for: “chin length, stacked nape, lightly layered or blunt perimeter — your choice, decided from the back photo.” Styling tip: tuck one side behind the ear and leave the other loose. The asymmetry flatters the face and shows off earrings or glasses, and it breaks up the symmetry of a short cut.
12. The Stacked Lob
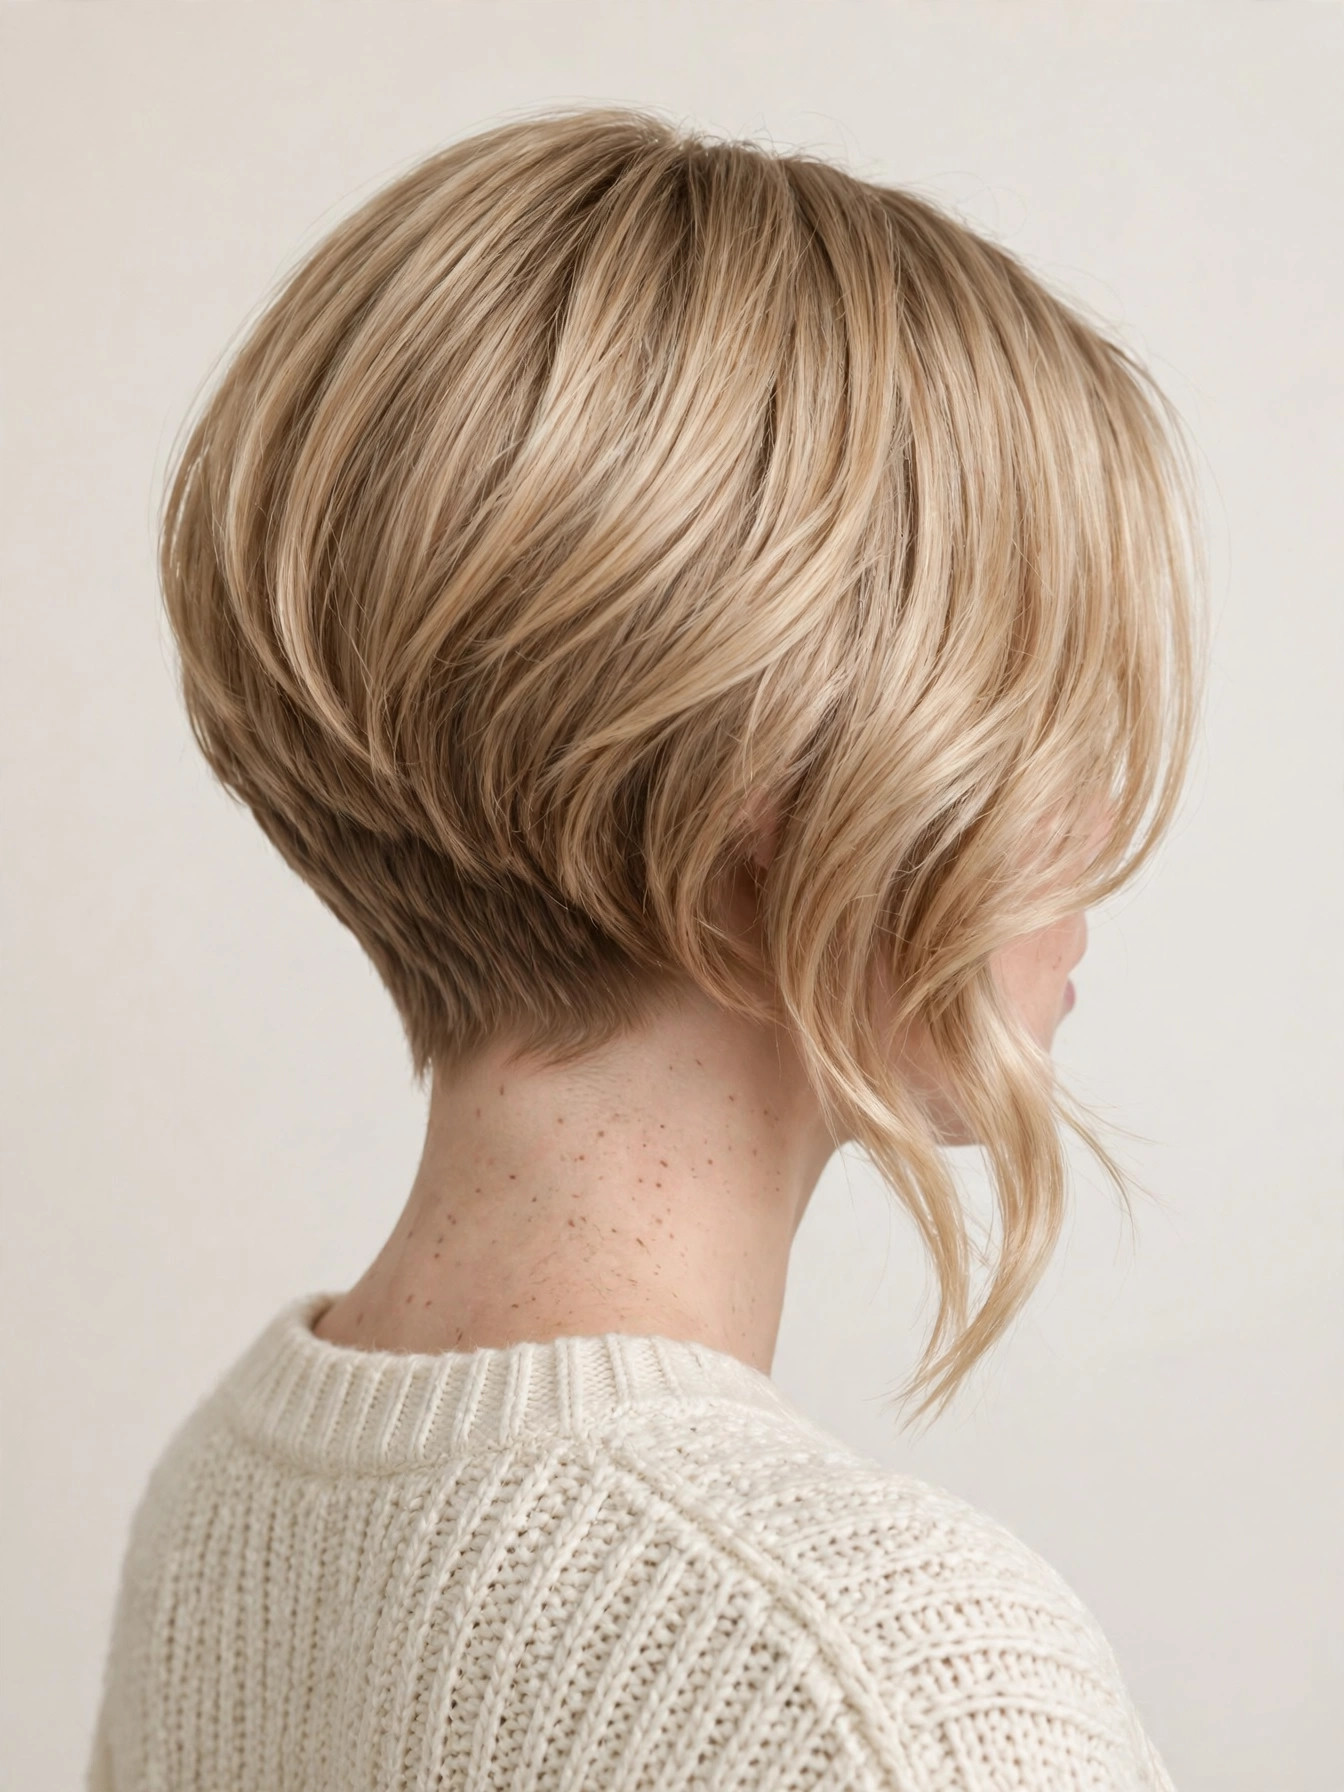
The long version: the stacked graduation stays at the back, but the front pieces reach the collarbone. You keep the lift where it matters and the length you are not ready to give up, which makes this the gentlest entry point into stacking. Who it suits: readers growing out a shorter cut, or anyone who wants volume without a short chop; medium to thick hair that feels heavy at one length. What to ask for: “graduation stacked at the nape, front pieces to the collarbone, long layers through the sides.” Styling tip: the front pieces need the most attention — blow-dry them forward over the shoulders, then flick them back, so they fall with movement instead of hanging straight down beside the stacked back.
13. The Asymmetrical Stacked Bob
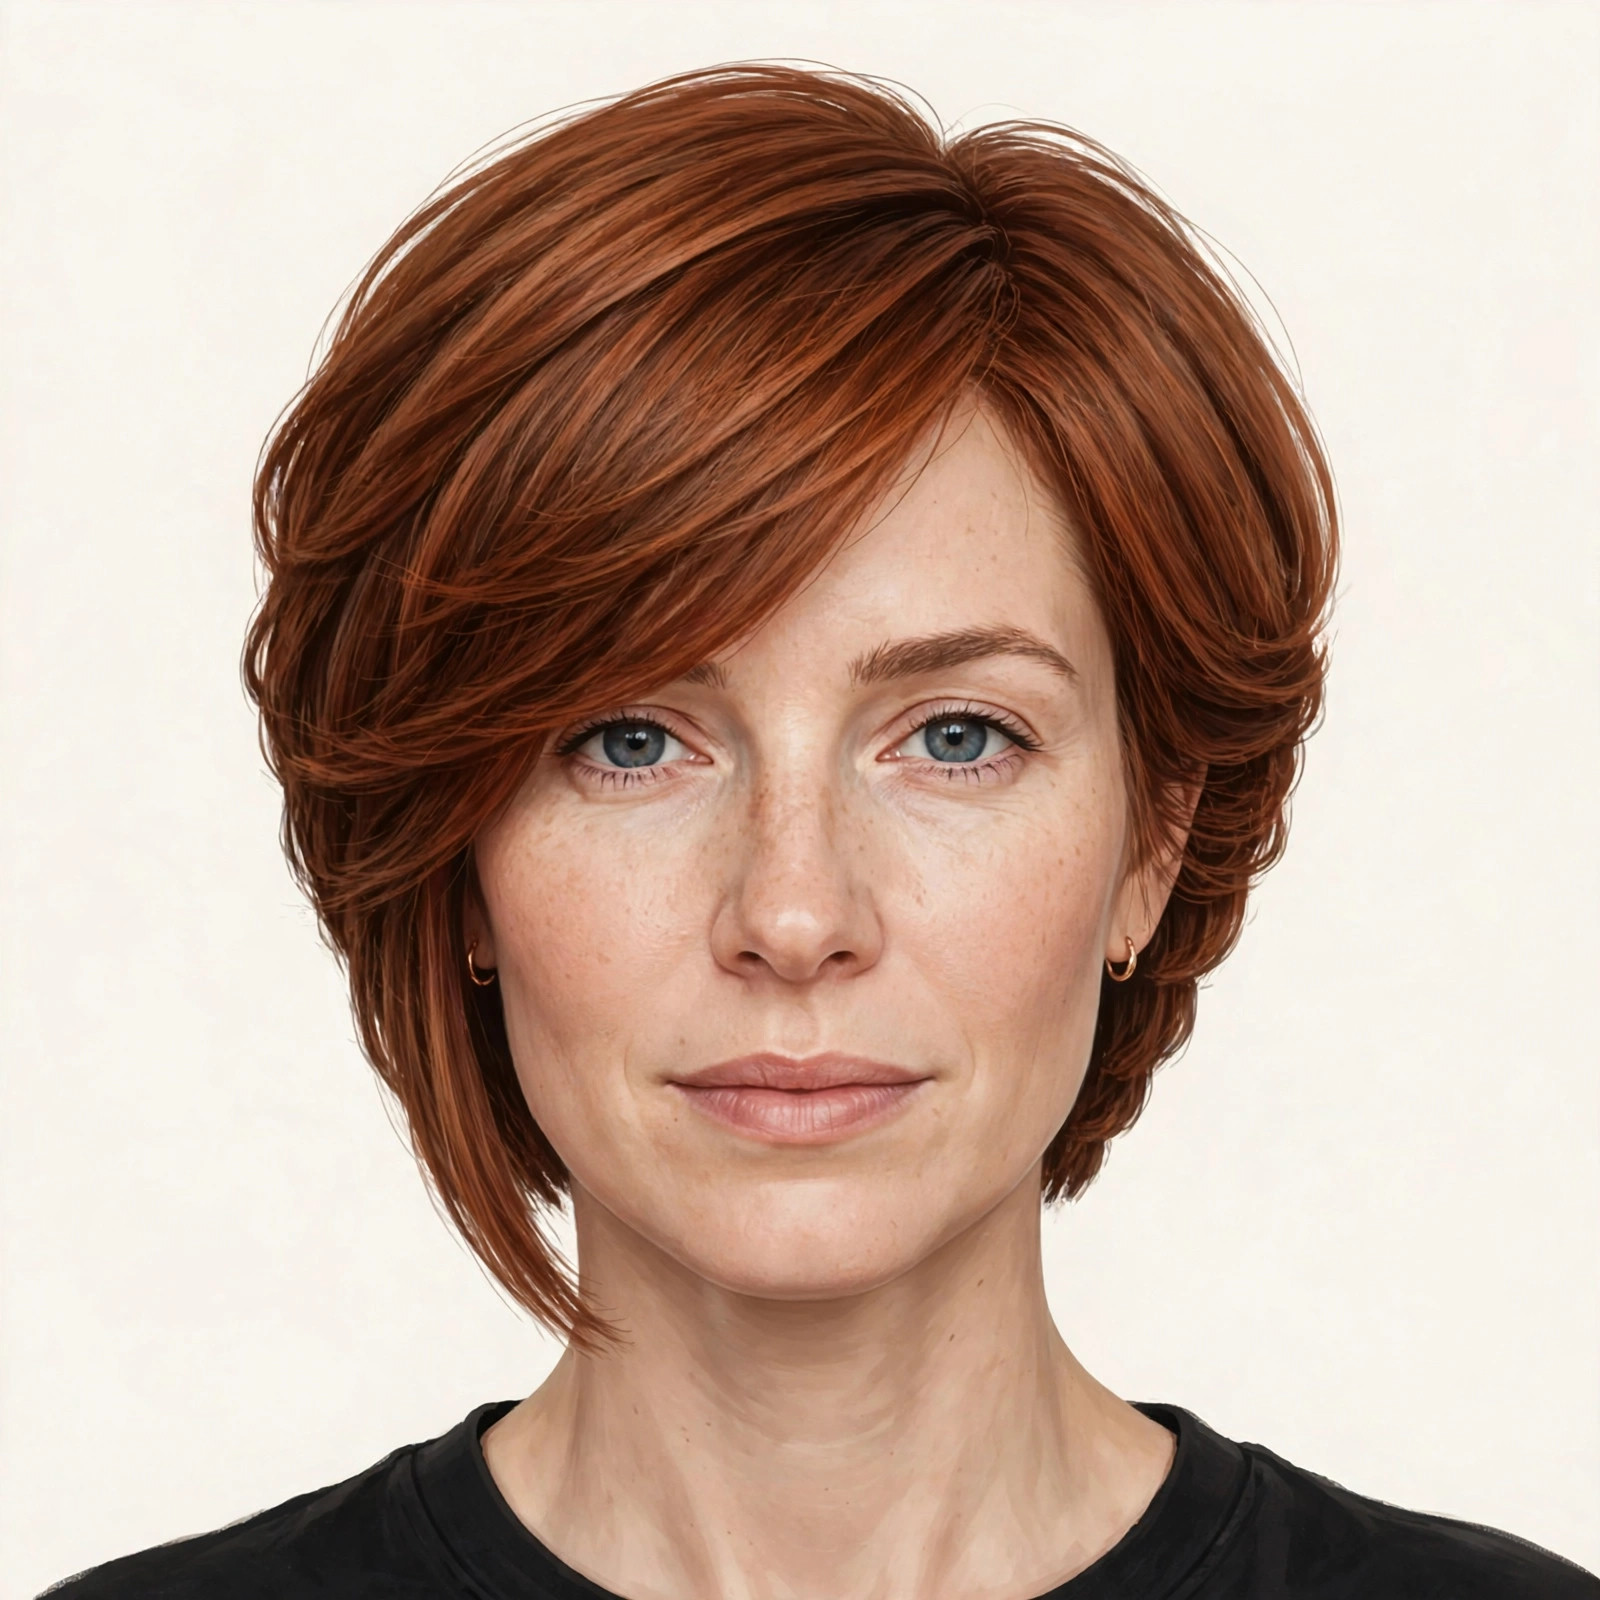
One side longer than the other, by a subtle inch or two — enough to read as intentional, not enough to complicate styling. The longer side draws the eye along the angle, and the stacked back keeps the shape balanced from behind. Who it suits: straight to wavy hair; readers who want an edge without a dramatic cut. What to ask for: “asymmetrical, one side about an inch longer, keep the stacked back even and the perimeter clean.” Styling tip: a deep side part on the longer side emphasises the asymmetry; a centre part softens it on days you want it quieter. Photograph the back as well as the front — asymmetry should be a front detail, not a lopsided nape.
14. Stacked Bob with a Deep Side Part
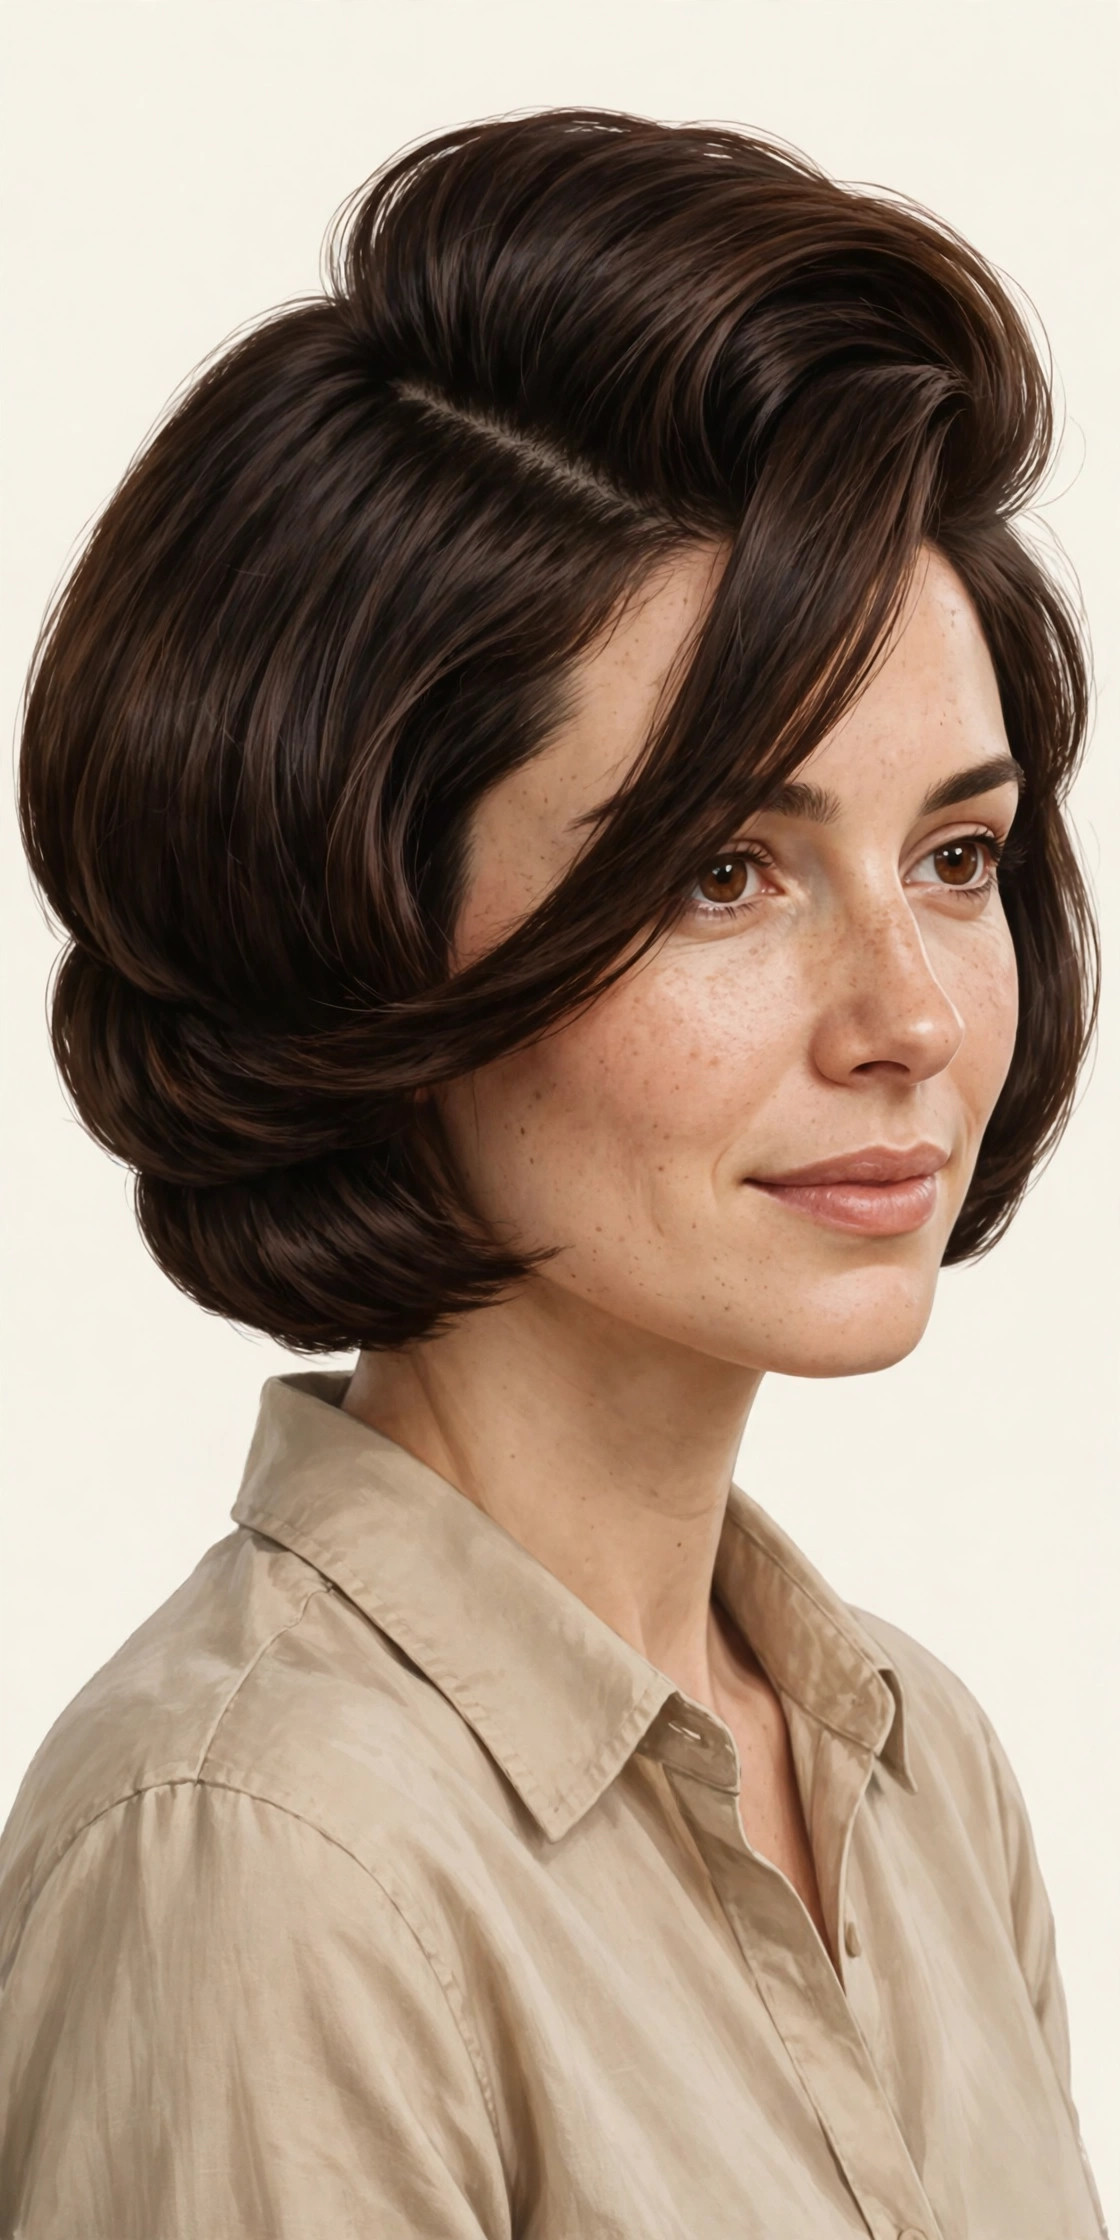
No new cutting, just a different parting — and on a stacked bob, the parting changes a lot. A deep side part lifts the crown on the heavy side, adds a diagonal line that flatters rounder faces, and lets the stacked back read as height rather than width. Who it suits: fine hair that needs root lift, and round or square faces that benefit from diagonal lines. What to ask for: “stacked back, cut to work with a deep side part, crown layers that lift when parted low on one side.” Styling tip: train the part while the hair is wet — a side part set on dry hair fights you all day. Dry the roots in the direction of the part first, then style the lengths.
15. Stacked Bob with a Tapered Nape
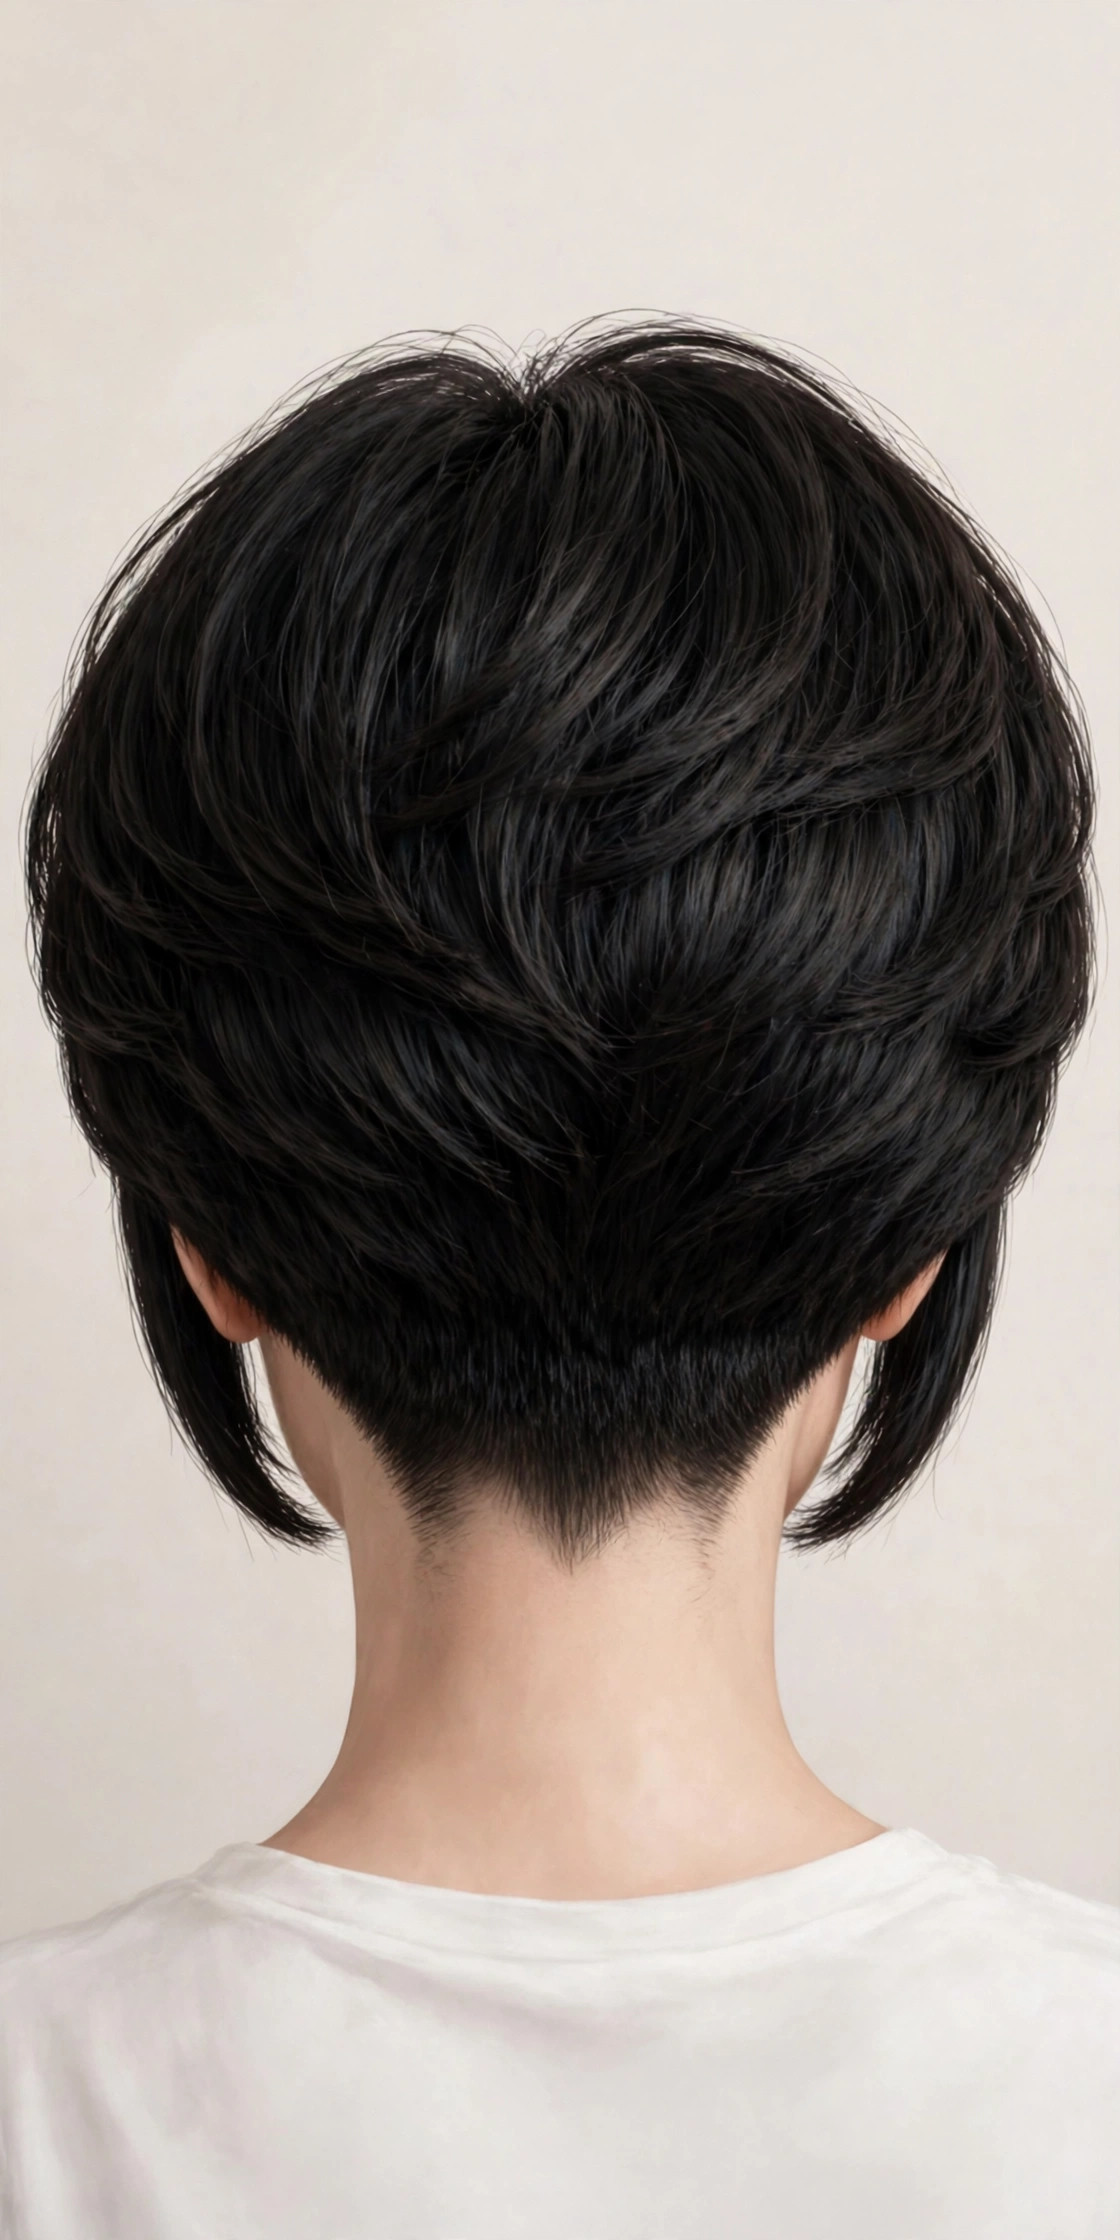
At the shortest, cleanest end of the family, the nape is tapered close while the crown keeps its stacked fullness and the front keeps its length. The back view is the whole point here: neat, close, and deliberately finished, with no stray length at the neckline. Who it suits: thick, dense hair that overwhelms softer versions, and anyone who wants the shortest possible morning routine at the back. What to ask for: “tapered nape, stacked crown above it, front length kept, show me the nape before you finish.” Styling tip: the top and front are the only parts that need product — a matte paste or light mousse, worked in with fingertips. Book tidy-up trims a little more often for this version, typically every 5–6 weeks depending on growth, to keep the taper sharp; once the nape grows out, the stack loses its clean finish first.
How to ask your stylist for a stacked bob (exact wording)
Bring 2–3 photos of the same length and texture as your hair — and make sure at least one of them is a back view. Photos beat descriptions every time for this cut, because “stacked” means different amounts of graduation to different stylists. Then use this sentence as your base: “I want a stacked bob, with graduated layers at the nape building volume at the crown, and front pieces to [your chosen length]. How much graduation would you put in for my hair texture?” Add your variation (“with curtain bangs”, “adapted for my curls”, “subtle stacking only”). Ask how the stack will grow out, and how often a trim will be needed for your version, before the scissors come out. If the stylist cannot show you the back shape they plan, or will not discuss graduation height, that is useful information before you commit.
Keeping a stacked bob looking sharp, honestly
A stacked bob is a shape, and shapes grow out. The stack loses its structure as the nape layers lengthen, so the most common reason a stacked bob “suddenly looks wrong” is simply that it is overdue a trim — typically every 6–8 weeks for most versions, sooner for tapered napes and fringes, depending on how fast your hair grows. Between cuts, root direction matters more than product quantity: dry the back upward, dry the crown in the direction of your part, and leave the nape alone while it dries. Over-styling the back is what creates a mushroom silhouette; the graduation should do the work. Wash frequency, heat use, and product choice all affect how long the shape holds, and they vary with hair condition and routine, so follow your stylist’s guidance for your version rather than a fixed schedule. If you are growing a stacked bob out, tell your stylist — the grow-out plan is to let the nape lengthen gradually while keeping the front shape, rather than cutting the stack off all at once.
FAQ
Will a stacked bob suit my face shape?
Stacked bobs suit most face shapes because the two levers — graduation height at the back and front length — can be adjusted separately. Shorter, higher stacking with a chin-length front tends to flatter oval and heart faces; longer fronts and softer stacking suit rounder faces better, because the length draws the eye down rather than widening the sides. The main combination to discuss carefully with your stylist is a very short, very steep stack on a very round face with very thick hair, where the width can build at the sides — a longer front and interior weight removal usually solve it.
Is a stacked bob high maintenance?
Day to day, it is one of the lower-maintenance short cuts, because the shape supplies the volume. The maintenance is in the trim cycle, not the morning routine: the stack is a precise shape, so it needs attention every 6–8 weeks in most cases, depending on growth rate. Fringe and tapered-nape versions need attention sooner. If you stretch trims to 3–4 months, expect the cut to read as an ordinary grown-out bob rather than a stacked one.
What is the difference between a stacked bob and an inverted bob?
They overlap, and the terms are often used interchangeably. As a general guide: “stacked” refers to the steep graduated layering at the back that builds crown volume; “inverted” (and “A-line”) refers to the angle of the perimeter, shorter at the back and longer at the front. A cut can be one, the other, or both. Bring photos of both the back and the front, and agree the graduation and the angle separately with your stylist.
Can I get a stacked bob with fine hair?
Yes — with the right adjustments, and fine hair is often where stacking helps most. Keep the graduation concentrated at the back and crown, keep the perimeter fairly full rather than thinned, and avoid heavy thinning through the ends, which removes the density fine hair needs. Shorter overall lengths also help, because there is less weight pulling the shape flat.
Will a stacked bob work if I do not use heat tools?
It depends on your texture. Wavy and curly versions air-dry well — the texture supplies the movement and the stack supplies the shape. Straight, fine hair usually needs at least root drying with a brush or dryer to activate the lift, because air-dried straight hair tends to fall flat against the scalp. If you rarely blow-dry, say so at the appointment and ask for the softer, subtler stacking in §3, cut to fall correctly air-dried.
Conclusion
The stacked bob earned its staying power by being structure, not styling: volume built into the back of the cut, a rounded silhouette that holds from every angle, and a front length you choose. Pick the version that matches your texture and your tolerance for trims, screenshot a front photo and a back photo, and show your stylist exactly how much graduation you want at the nape.
Keep exploring: 15 Italian Bob Haircut Ideas for a Sophisticated Look · 15 Trendy Bixie Haircut Ideas You Need to Try in 2026 · 15 Gray Bob Hairstyles for a Polished Look
Love a shape that holds its volume? Save this to your Pinterest board for your next salon visit — your future good-hair days will thank you.


